Read this in your language: Português (Brasil) · Español · English (you are here)
GClaude Indexer
GClaude Indexer reads a folder full of documents on your own Windows PC (PDFs, scans, Word, Excel, e-mails and more) and builds a small, organized index of everything in it: what each item is, its date, who it is from and which page it is on. You then give Claude that index instead of the whole pile of documents. It is made for anyone who works with large collections of documents and uses Claude: lawyers, accountants, researchers, public offices, small companies.
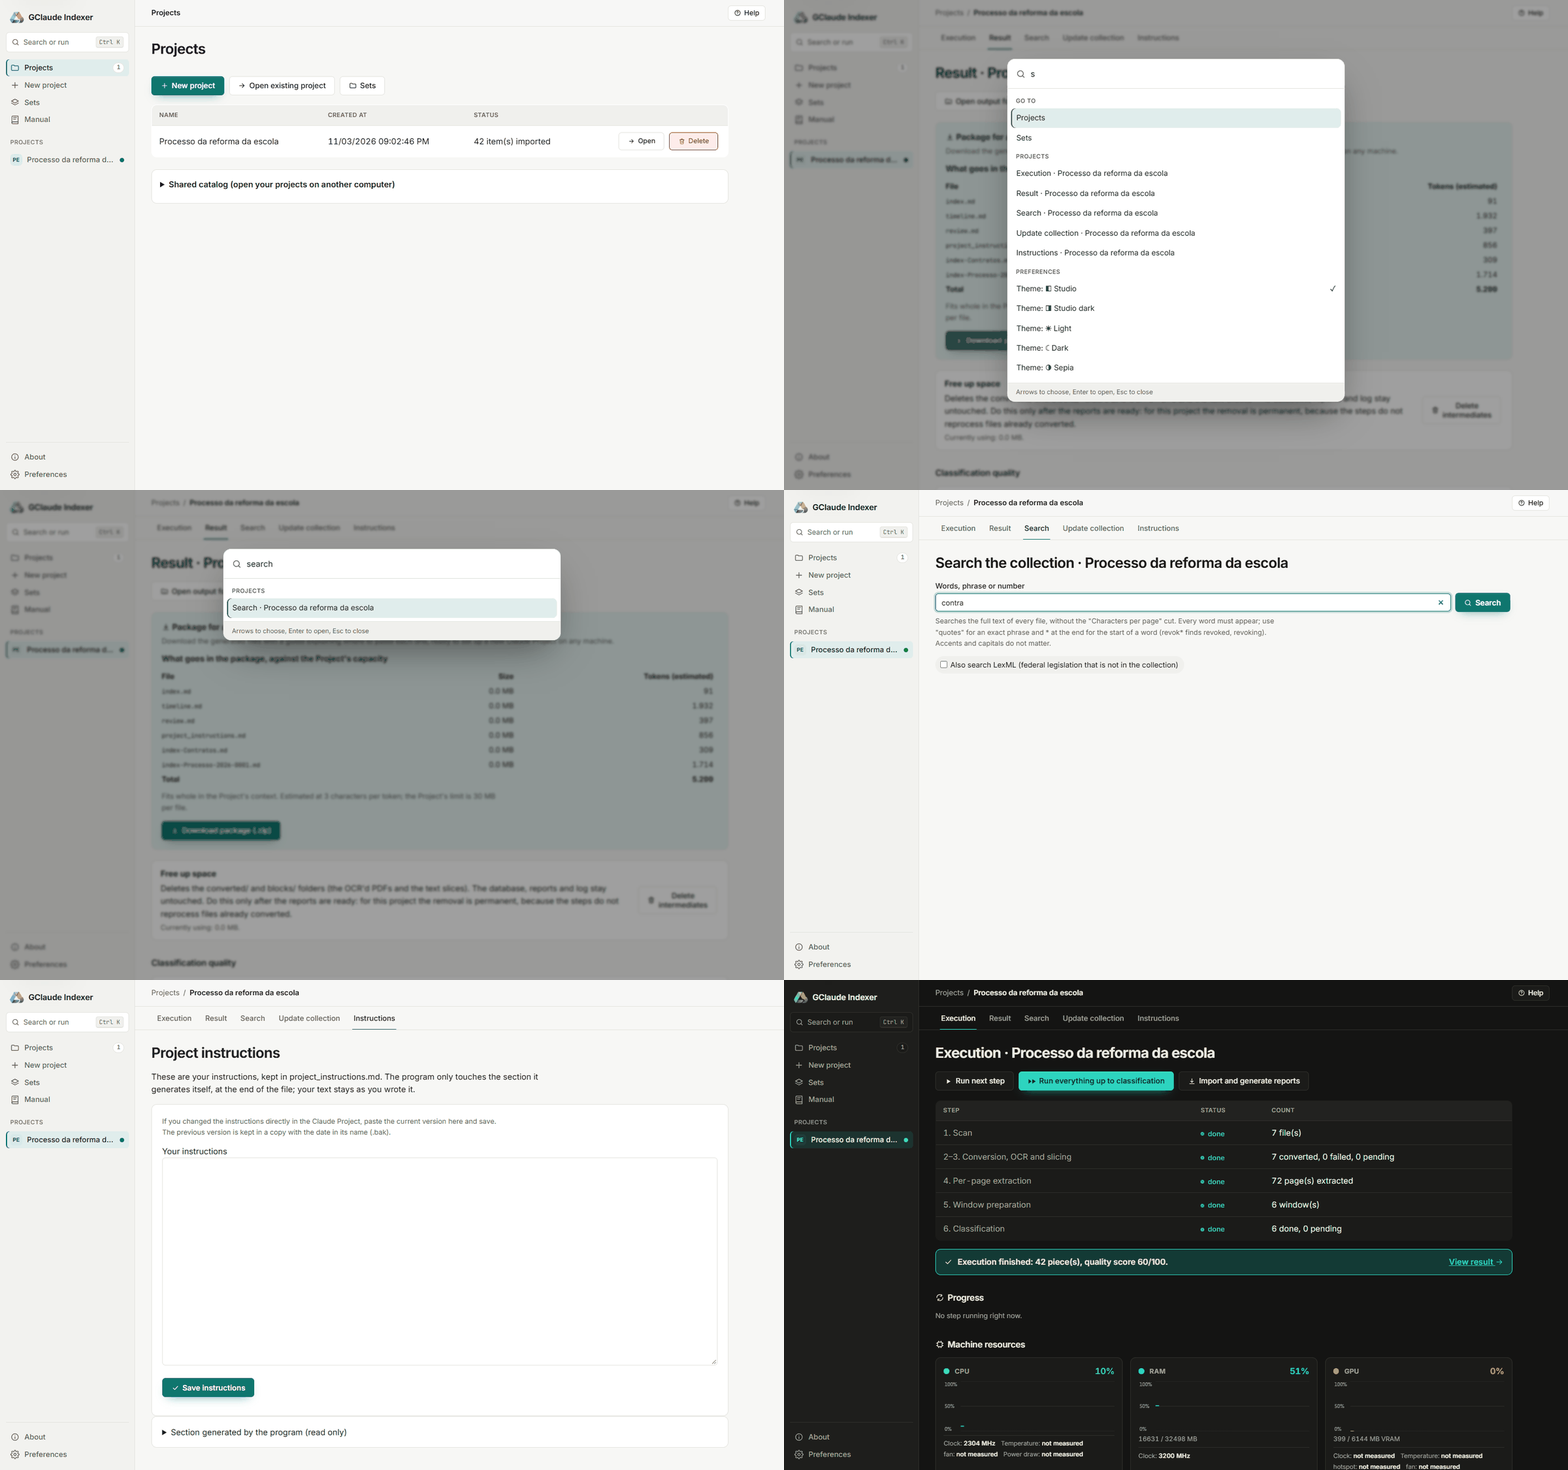
A short tour of the app.
What it is for
1. Spend less of your paid Claude subscription. Claude counts every page you make it read. With GClaude Indexer, Claude reads a compact index first, finds which document and which page answer your question, and opens only those. Example: a lawyer with a 3,000-page case file asks "when was the expert report filed?". Claude looks it up in the index and opens one document, not all 3,000 pages.
2. Work with far more documents than Claude can hold at once. Claude has a limit on how much text it can consider at the same time. A large collection does not fit, but its index does: it is split into one small file per group, so even thousands of pages turn into something Claude can browse. The full text stays on your side, ready to be opened page by page.
3. Your data stays with you. Reading, text recognition (OCR) and classification all happen on your computer. Nothing is sent anywhere while the collection is processed. The result is a local database plus a few text files, kept in a folder you choose. If that folder is on Google Drive, you can open the same project from any computer signed into that Drive.
4. Keep the index up to date without starting over. Collections grow. When you add, change or remove documents, the app finds what changed and redoes only that part. It shows you the plan and the cost before it touches anything.
5. Easy for one person or a whole office. One person can use it on a laptop. A team can keep the projects in a shared Drive folder or on a file server. Example: an office team shares a Drive folder of client files; one colleague updates the index in the morning, another opens the same project in the afternoon on a different PC.
How it works in one minute
flowchart LR
    A["Your documents folder<br/>PDF, scans, Word, Excel, e-mail…"] --> B["GClaude Indexer on your PC<br/>reads · OCR · classifies"]
    B --> C["Compact index files<br/>index.md + one index per group<br/>timeline.md · review.md<br/>project_instructions.md"]
    C --> D["Claude reads the index"]
    D --> E["Claude opens only the<br/>original pages it needs"]
    A -. "original files" .-> E
- You point the app at a folder of documents. It never changes that folder; it only reads it.
- On your PC, it turns every page into text (using OCR for scans), then works out where each document starts and ends, its type, date, author and a short summary.
- It writes a few small Markdown files: a table of contents (
index.md), one index per group of documents, a timeline, a review report and ready-made instructions for Claude. - You give those files to Claude. When it needs details, it opens just the original page the index points to.
To give you an idea of time: a real collection of about 2,900 pages took a little over 5 hours with the local model on an ordinary graphics card. With the rules engine, it takes minutes.
Screenshots
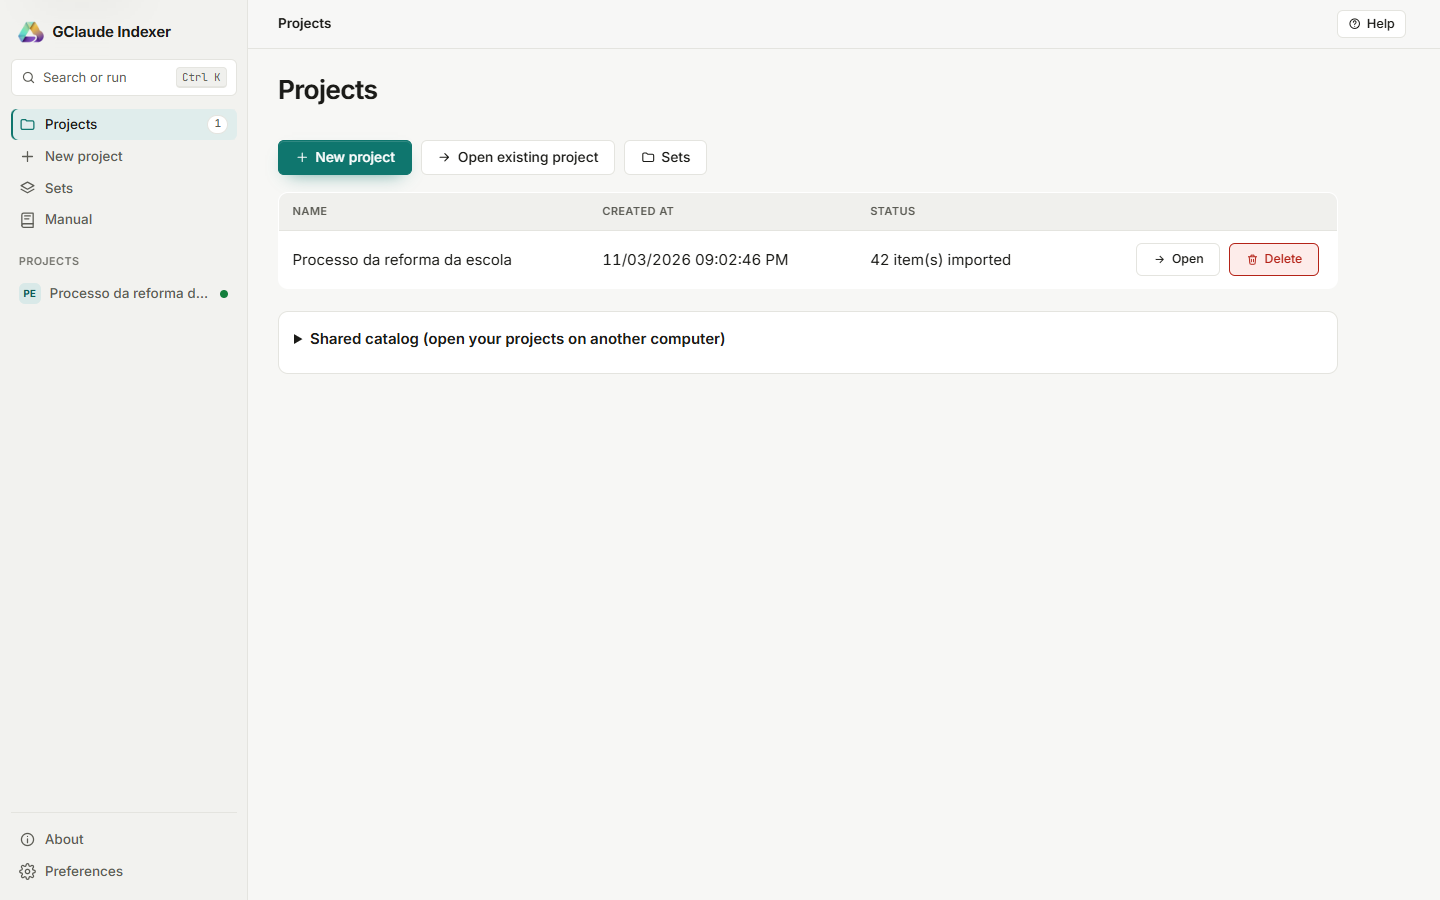
Projects: every collection this computer knows, plus the shared catalog that lets another computer open the same projects.
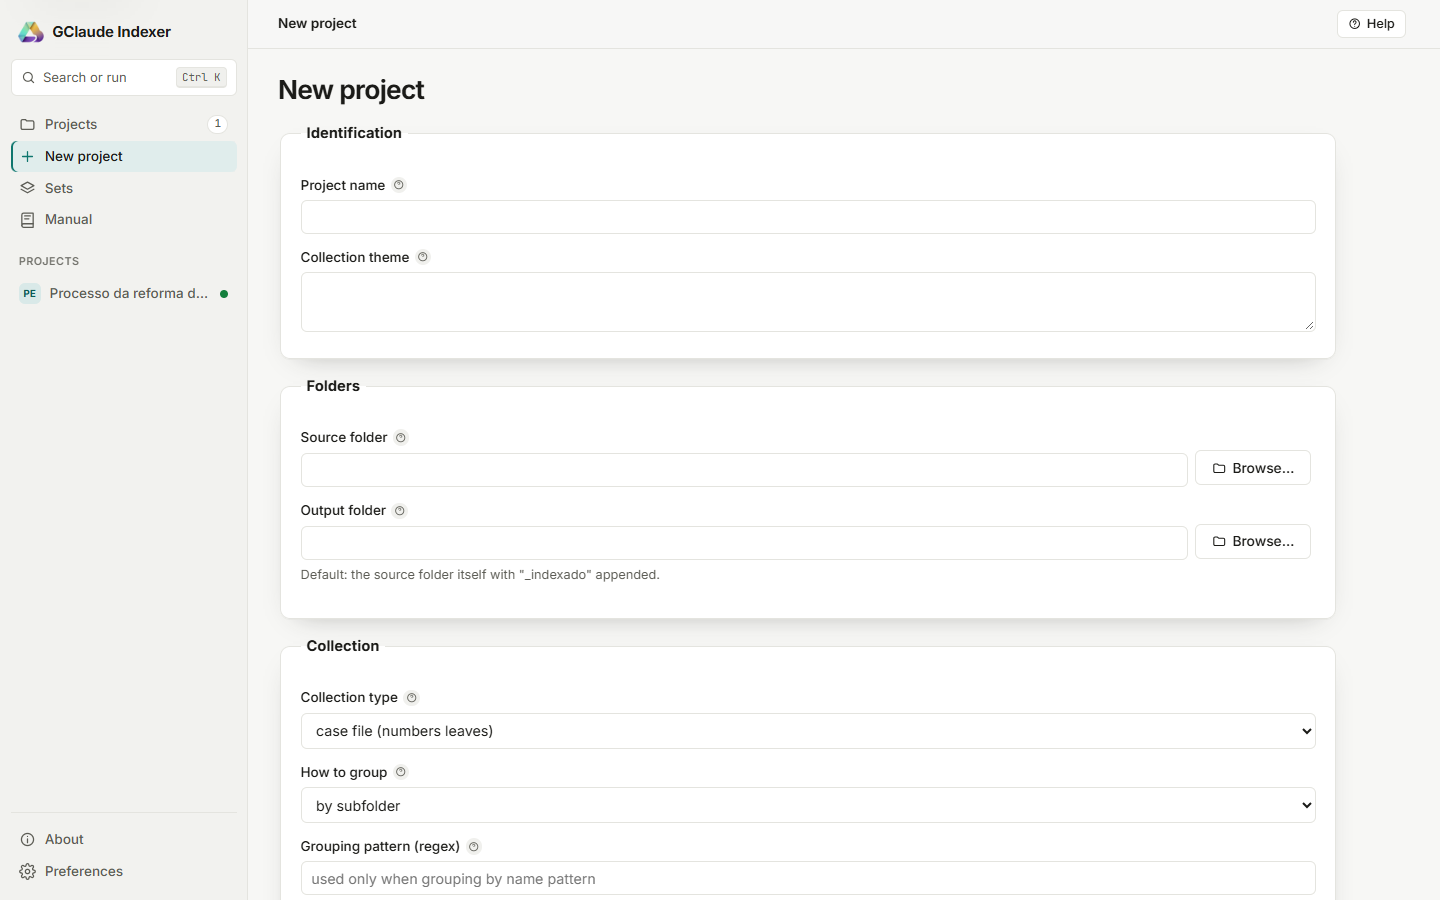
New project: folders, file types, OCR language and classification engine on one screen; usually only the name and the source folder need filling in.
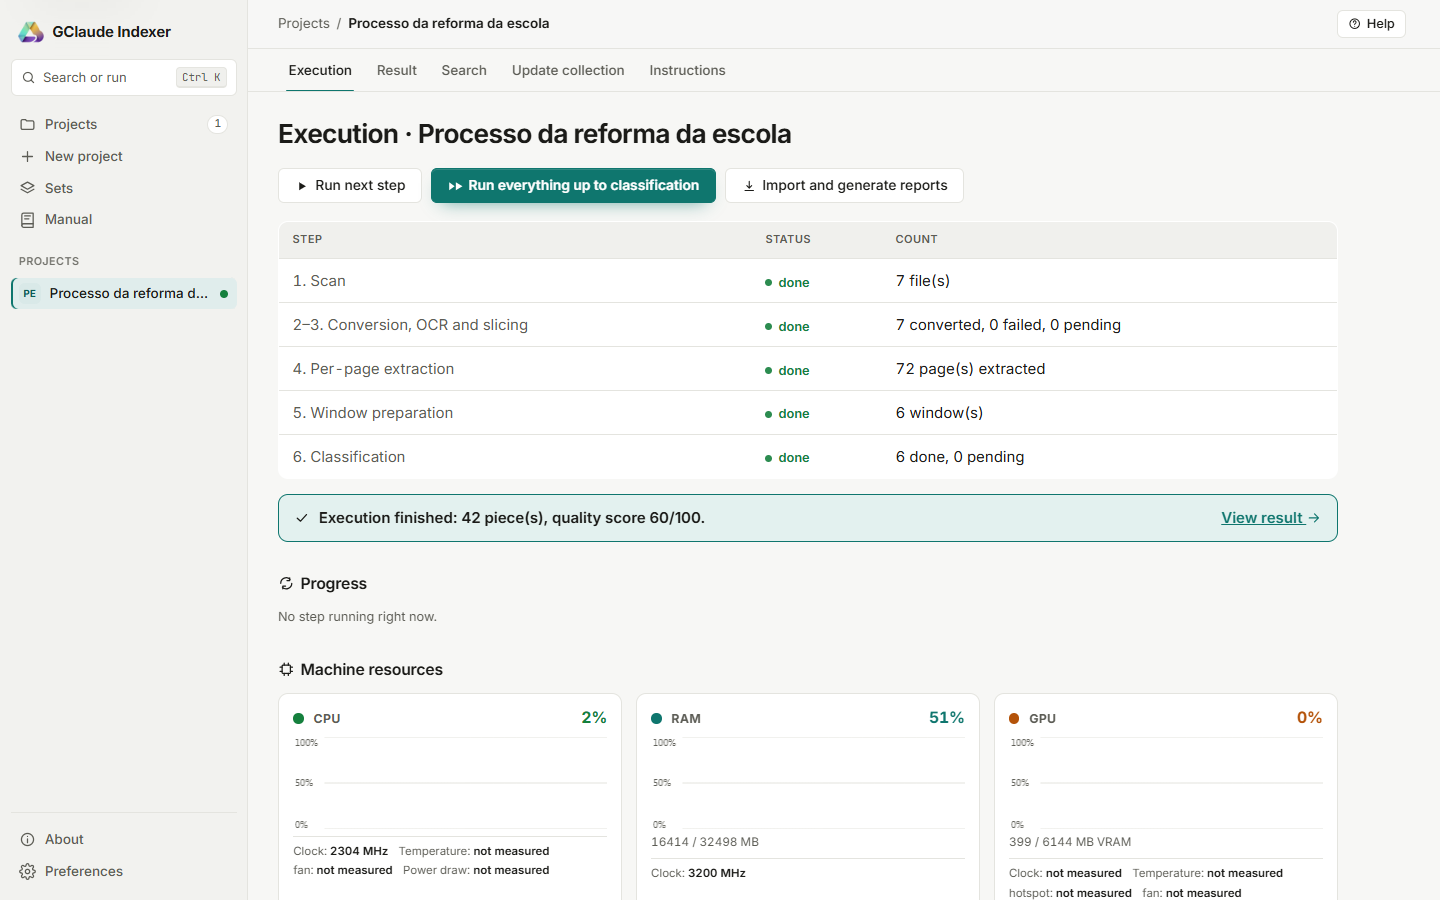
Execution: the steps with live progress, CPU/RAM/GPU graphs and a log written in plain language.
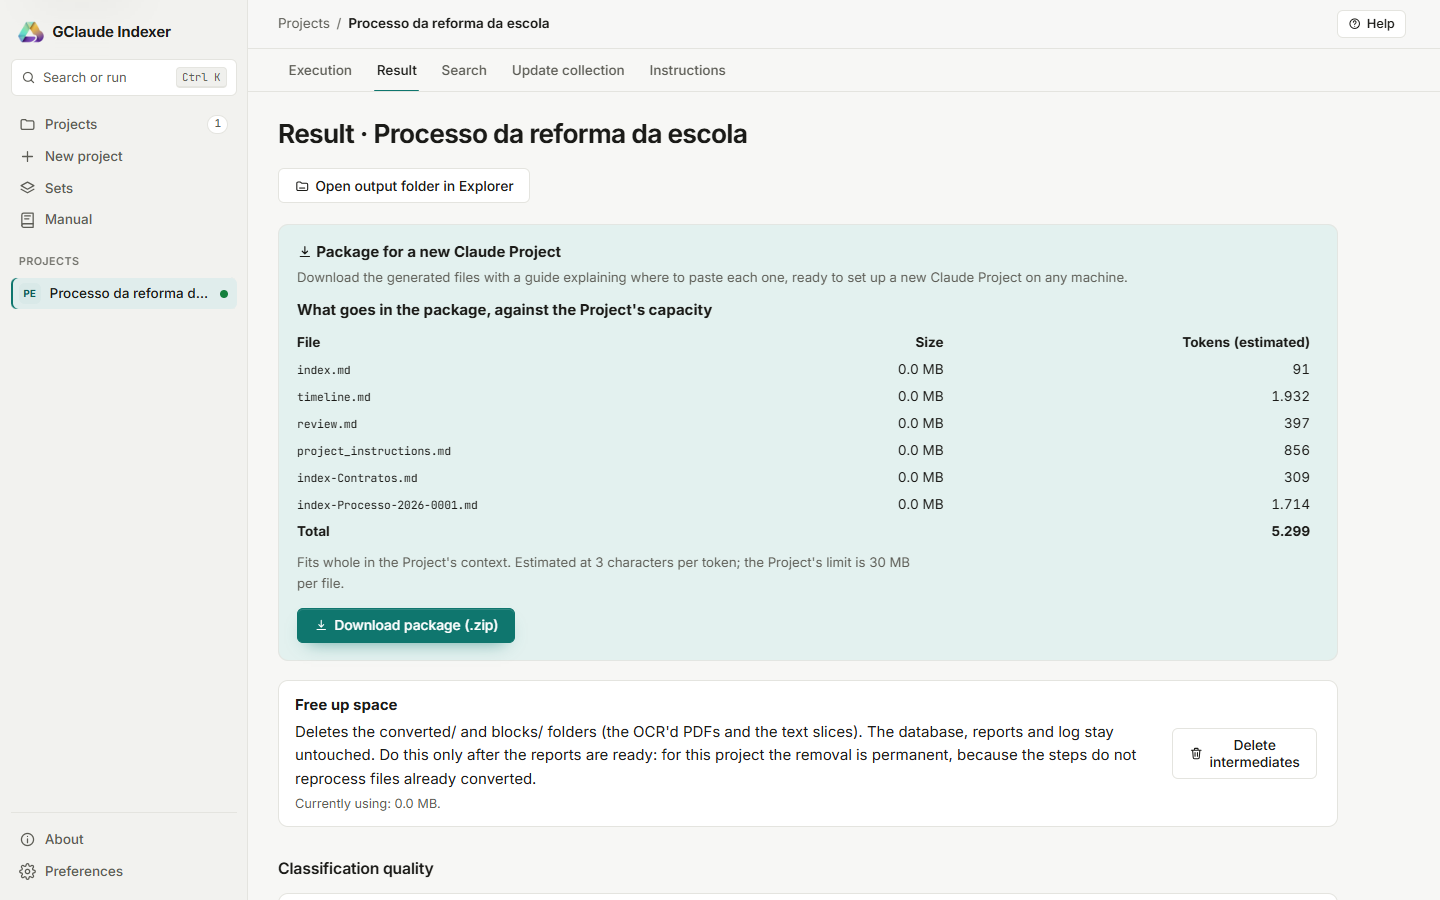
Result: quality score, pending items, a preview of each generated file and the package for Claude.
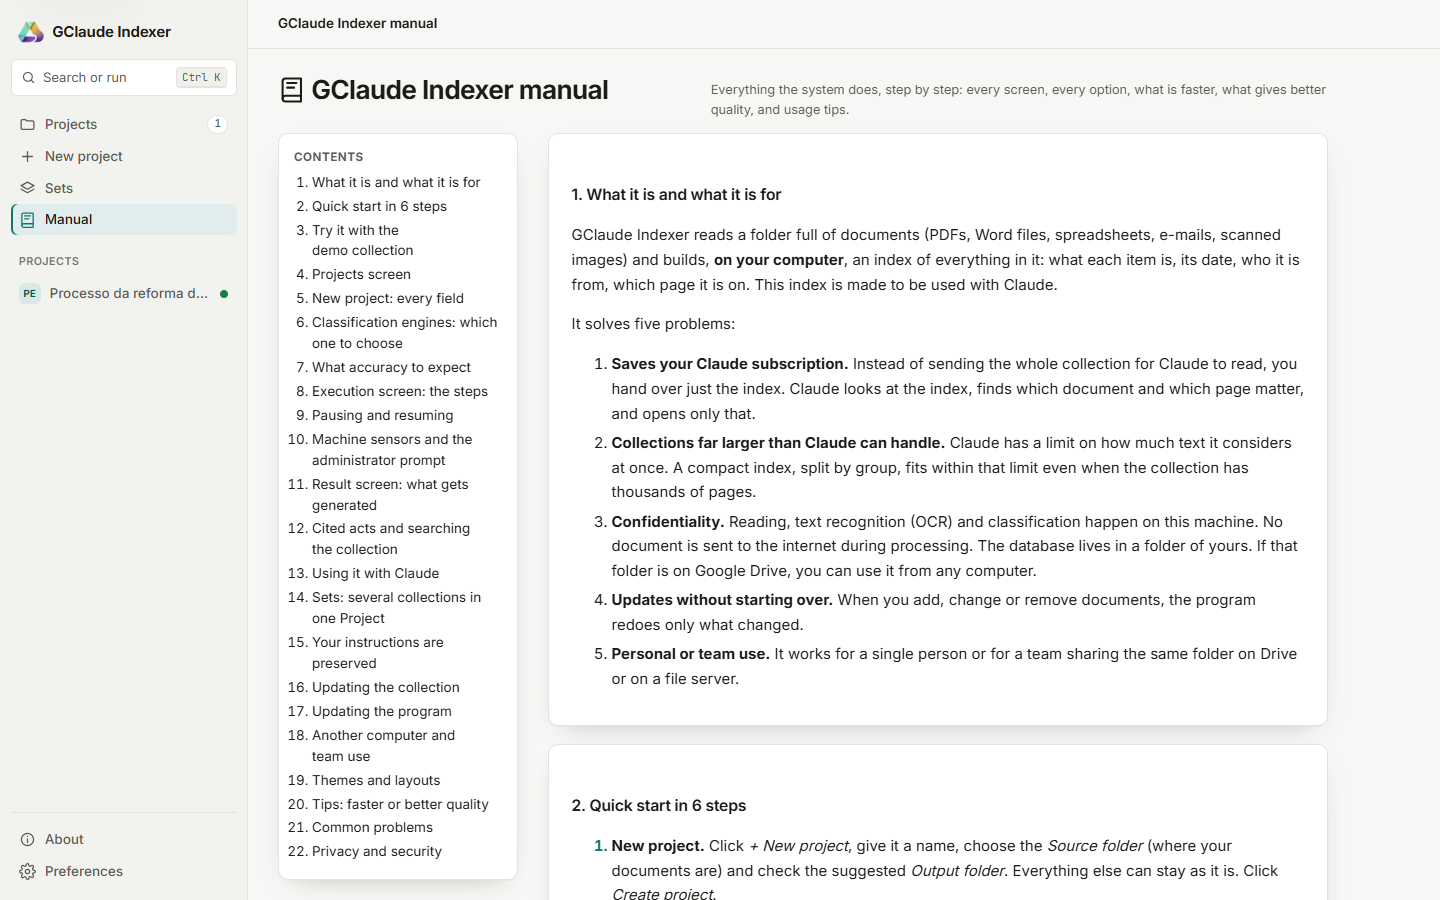
Manual: every screen and option explained inside the app, in your language.
What's new in 1.4
- Instructions you already have are kept. What the app writes in
project_instructions.mdandCLAUDE.mdnow sits between two markers (GCLAUDE-INDEXER:BEGINandGCLAUDE-INDEXER:END). Only that block is rewritten; everything else in the file is yours and stays. The first time, a.bakcopy of your original file is saved. A new field on the New project form, Instructions you already use, puts your existing instructions at the top of the file. - Safer handling of removed files. If a removed document had an identical copy in the folder, the copy is indexed in its place. When removing a document from the middle of a case file changes the sheet numbers of the documents after it, you are warned on the confirmation screen and in the log. The removed file's converted copy is cleaned up, and indexes of groups that no longer exist are deleted.
- A full manual inside the app. The Manual menu explains every screen and option, in English, Portuguese and Spanish.
- A live log in plain language. Messages say what happened and what to do; technical details only appear in parentheses at the end.
- Four new themes (Aurora, Gown, Graphite and Ocean) and smooth motion between screens, switched off automatically when Windows asks for reduced motion.
- Security hardening. The app only accepts requests from its own screens (protection against CSRF and DNS rebinding), so a website open in your browser cannot give it orders. Deleting a project removes only what the app created. The instructions for the Claude Code engine treat document text as untrusted data. Calls to the local model never go through a proxy. FastAPI and Starlette were updated.
- Faster screens. Lighter progress checks and new database indexes.
Install
What you need
- Windows 10 or 11. The app only runs on Windows (details under Technical details below).
- A few gigabytes of free disk space.
- Everything else (Python 3.12, Tesseract, Ghostscript, Ollama and the local model) is installed for you.
- A graphics card (GPU) with a few gigabytes of memory makes the local
model much faster, but it is not required. The default model
(
qwen3.5:4b) is about a 3.2 GB download and fits a 6 GB card as well as an 8 GB one. If the machine has too little memory, the app switches to therulesengine on its own and tells you why.
The easy way: the Windows installer
- Download
GClaude-Indexer-Setup-1.5.1.exefrom the latest release. - Double-click it. It asks whether to install just for you or for everyone on the machine, shows the licence and lets you tick which dependencies to fetch.
- It downloads and installs all of them (Python 3.12, Tesseract with the Portuguese language data, Ghostscript, Ollama and the classification model) with a progress bar and no terminal window.
Windows SmartScreen will warn you. The installer is not code-signed, because a certificate costs money this project does not have. Click "More info" and then "Run anyway". It is good practice to check the file you downloaded against the SHA-256 published with each release.
About Ollama. Ollama is the free program that runs the local model on
your own machine. The installer installs it and the default model when you
accept. You can skip it: the rules engine needs nothing extra.
Uninstalling. Use Settings > Apps, like any other program. It asks, one by one, which shared dependencies should go with it. It never deletes your projects.
You do not need Git, a GitHub account or programming experience. If you cannot install programs on the machine, see Installing without the installer under Technical details.
Quick start in 6 steps
- New project. Click + New project, give it a name, choose the Source folder (where your documents are) and check the suggested Output folder. The rest can stay as it is. Click Create project.
- Run everything. On the Execution screen, click Run everything up to classification. You can leave it running and do something else.
- Generate the reports. When classification finishes, click Import and generate reports.
- Check the result. The Result screen shows the quality score, any pending items and a preview of each file.
- Download the package. Under Package for a new Claude Project, click Download package (.zip).
- Use it in Claude. On claude.ai, create a Project, paste the whole
contents of
project_instructions.mdinto its instructions and upload the other files as project knowledge. When you need the exact content of an item, send Claude only the original document the index points to.
On every screen, the Help button gives a summary of that screen, and the ? next to each field explains it.
Personal or corporate use
- Output folder on Google Drive or a file server. Each project lives entirely in its output folder. Put it on Drive or on a network share and any computer with access can open it.
- Shared catalog. On the Projects screen, point Shared catalog at a folder inside your Drive. Every computer signed into that Drive then sees the same list of projects. Without it, the list stays on each machine, even though the projects themselves sync.
- One computer at a time. While a project is open, it is locked to that computer. Another computer is told who is using it. The lock expires on its own after a while without use.
- Golden rule when switching computers: close the program on the first one, wait for Google Drive to finish syncing, and only then open it on the second. The app warns about incomplete syncs, but it cannot replace waiting.
Privacy and security
- Documents are read and classified only on your computer. During
processing, no document, page of text or even file name is sent over the
network. The local engine talks only to Ollama on the same machine
(
http://127.0.0.1:11434), never through a proxy. - The app's server listens only on
127.0.0.1(your own machine) and is never reachable from the network. It accepts requests only from its own screens: a website open in your browser cannot give it orders. - The source folder is never modified. Everything the app produces goes into the separate output folder.
- The project database (
project.db) stores the text of the pages. If the collection contains personal data (for example under Brazil's LGPD or the GDPR), protect the output folder as you would protect the documents themselves, including on Google Drive. - Content reaches Claude only when you send it: when you upload the
index files or a document to a Claude Project, or when you choose the
optional
claude_codeengine. That content then goes through your Claude account, under the terms of your plan.
Full manual
Open the Manual menu at the top of any screen in the app. It covers every screen and every option, which settings are faster and which give better quality, how to use the results with Claude, team use, common problems and tips. It is available in English, Portuguese and Spanish.
Technical details
Click a topic to expand it.
Requirements in detail
- Windows 10 or 11, required. The app talks directly to Windows-specific interfaces: PowerShell, WMI (hardware detection and resource monitoring), the Windows registry (Tesseract data location and locale detection) and Performance Counters (live CPU/GPU graphs). It does not run on Linux or macOS.
- Python 3.12, installed for you if missing. This project pins dependency versions that newer Pythons (3.13, 3.14) break, so the installer looks for 3.12 and, if the machine does not have it, downloads and installs the official 3.12.10 for the current user: no administrator, no manual step, and any other Python already on the machine is left exactly where it is.
- OCR (scanned documents with no text layer) needs Tesseract and Ghostscript. The installer installs both when possible.
- The
localengine (the recommended default) needs Ollama, installed by the installer when you accept. A GPU with a few gigabytes of free VRAM speeds it up a lot but is not required: Ollama uses as much GPU memory as fits and spills the rest into system RAM. The default model (qwen3.5:4b) is about 3.2 GB to download and needs somewhat more than that in combined VRAM + RAM to run. A machine with too little of both falls back to therulesengine automatically, with an explanation on screen. - The
rulesengine needs none of the above: it runs on any Windows machine that can run Python, with no GPU, no download and no extra software. - A few gigabytes of free disk space for the Python environment and, if you use it, the Ollama model.
- The interface is in English, Brazilian Portuguese and Spanish, chosen from a menu in the page header. The default follows your Windows display language.
- The installer is a convenience for the first setup. The app itself is not
compiled into a single
.exe: it stays as plain, readable Python and PowerShell scripts, and a desktop shortcut opens it with a double-click.
Installing without the installer
This path also works on a machine where you cannot install programs. In
short: run Indexer.bat and follow the instructions. Step by step:
1. Get the source code onto your machine. If you downloaded the project
as a .zip, right-click it, choose "Extract All…" and pick a regular folder
(for example in Documents, or a Google Drive folder mounted with a drive
letter). If you cloned it with Git, you already have a folder. Either way,
remember where it is; below it is called "the project folder".
2. Open PowerShell in the project folder. In File Explorer, open the
project folder, then either hold Shift, right-click an empty spot and
choose "Open PowerShell window here" (or "Open in Terminal"), or click the
address bar, type powershell and press Enter. A blue or dark window opens,
already "in" the project folder.
3. You do not have to install Python yourself. The installer in step 4
does it: it needs Python 3.12 specifically, and if your machine does not
have it, it downloads the official 3.12 from python.org (exact version,
checksum verified) into your own user folder. No administrator rights are
needed for that. It is installed beside any other Python you have: if
python --version prints 3.13 or 3.14 today, it still will afterwards, and
your file associations and Start Menu are left as they are. If you prefer
to install it yourself first, this is the same thing the installer does:
winget install --id Python.Python.3.12 -e --scope user --silent --accept-package-agreements --accept-source-agreements
4. Run the installer once. It installs Python 3.12 if missing, creates a private Python environment for this app (outside the project folder, so it survives being moved or re-synced by Google Drive/OneDrive), installs the Python packages, checks for Tesseract and Ghostscript (installing them if missing and you agree) and offers a desktop shortcut.
powershell -ExecutionPolicy Bypass -File install.ps1
Windows may show "Windows protected your PC" the first time you run a
PowerShell script downloaded from the internet. That is normal: the
-ExecutionPolicy Bypass flag runs this one script without changing any
permanent setting. The installer shows its progress and asks before
installing anything (Tesseract, Ghostscript and, optionally, Ollama and its
default model, which is a large download). If a step fails, it prints the
manual command to run instead. The first run can take several minutes,
mostly downloading packages.
5. Accept the desktop shortcut at the end if you want one; it is the
easiest way to open the app. A second, optional shortcut, "GClaude
Indexer (CPU sensor)", is offered too: say yes only if you want CPU
temperature and power draw on the Execution screen (see The optional CPU
sensor). You can change your mind later with
install.ps1 -CpuSensorShortcut.
Running day to day
Double-click the desktop shortcut. A console window appears only the first time, if the installer still needs to run; after that the app starts with no visible window and opens your browser at:
http://127.0.0.1:8000
The server only listens on 127.0.0.1, your own machine, and is never
reachable from the network or from another computer.
Without the shortcut, from the project folder:
python launcher.py
This checks the environment and installs anything missing before starting the server, so it also works as a "just make it work" command on a machine where you have not run the installer yet.
To close the app, close the terminal window it opened (or, if it runs
hidden via the shortcut, end pythonw.exe in Task Manager).
The optional CPU sensor
The "GClaude Indexer (CPU sensor)" shortcut raises a Windows administrator prompt every time you open the app, because CPU temperature and power draw can only be read with administrator rights. What is elevated is not the app: it is one small helper process that only reads the sensors and hands the numbers back. The server, the indexing and your documents run without any privileges, and the helper closes together with the app.
Answering No is safe and costs nothing else: the app opens exactly as from the ordinary shortcut, showing GPU temperature, power and clock, and "not measured" for the two CPU sensors. Nothing fails and no error is shown. Everything else, including the GPU readings, works without this shortcut.
Uninstalling in detail
If you installed with the Windows installer, use Settings > Apps.
Otherwise, double-click Desinstalar.bat in the project folder (the same
folder as Indexer.bat), or from a prompt:
.\Desinstalar.bat
powershell -ExecutionPolicy Bypass -File uninstall.ps1
Why not just .\uninstall.ps1? Google Drive marks every file it syncs
as coming from the internet, and Windows' default execution policy
(RemoteSigned) refuses to run such a .ps1 without a digital signature
("the file is not digitally signed"). Nothing is wrong with the script:
Desinstalar.bat passes -ExecutionPolicy Bypass for that one run, like
every other launcher in this project. Running install.ps1 also clears the
mark from this folder's scripts, so the direct command works after that.
It asks about each item separately, defaulting to no every time. It separates what this installation owns