English · Français
A box that plays a story when a child puts a figurine on top. No screen, no account, no subscription, and nothing that leaves the house.
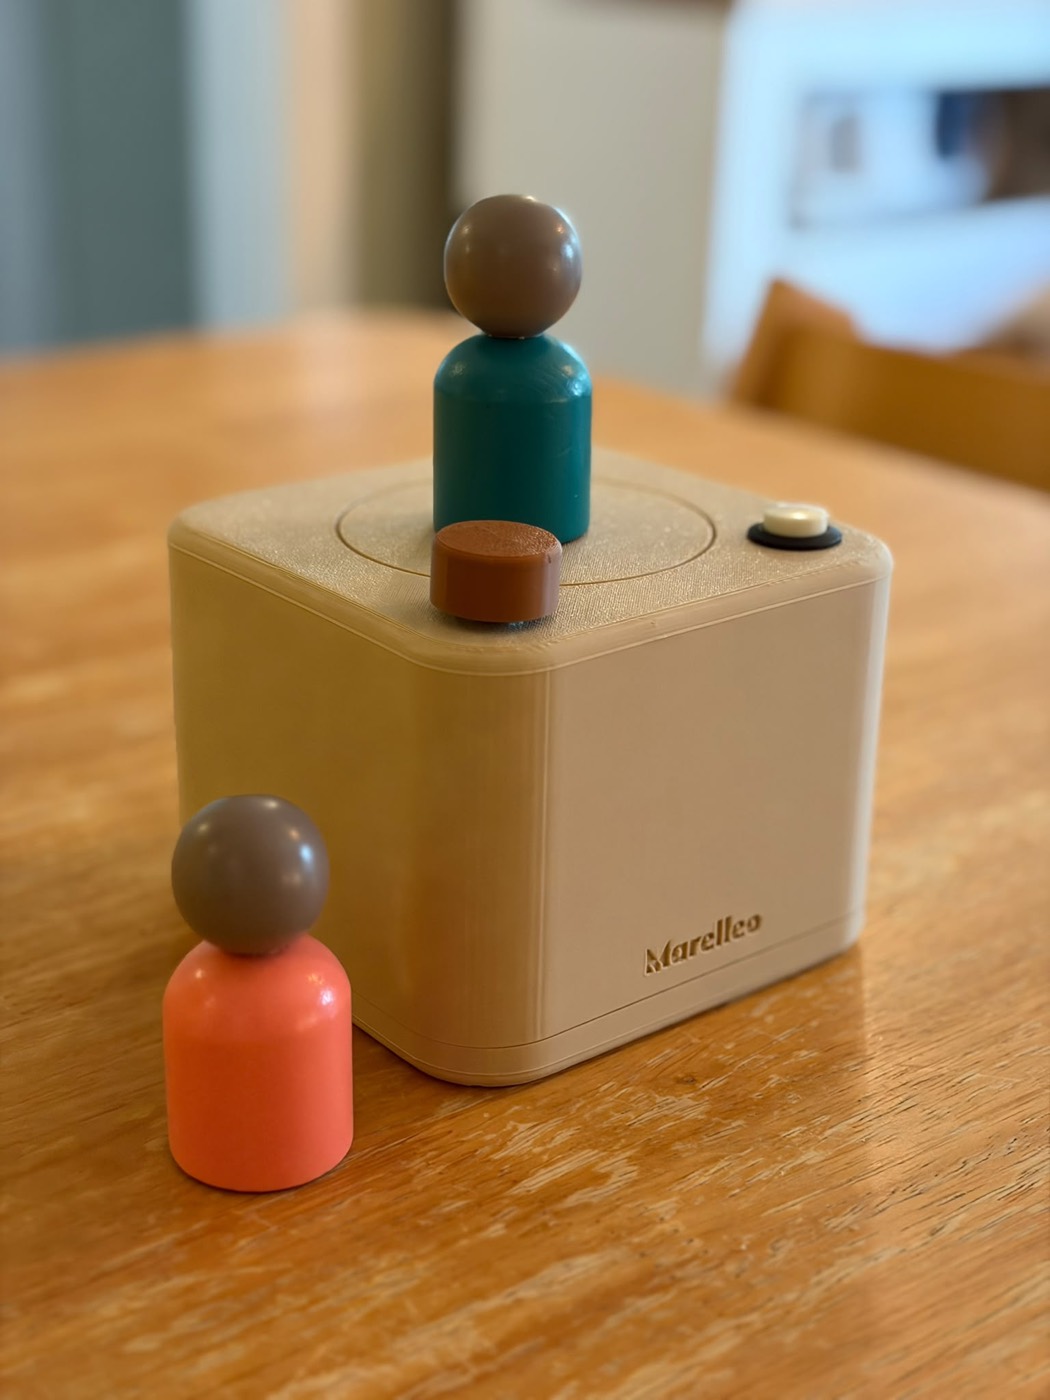
I built it for my three kids knowing nothing about electronics when I started. Everything is here to rebuild it: the files to print, the board's manufacturing files, the code, and enough guidance to get through it if you have never soldered.
The story of the project, mistakes included, is written up here: zebra.rodeo/en/blog/marelleo
What it does
An NFC sticker is glued under a figurine. You put it on the engraved circle, the box reads the sticker and plays whatever is associated with it: a file, a list of files, or a live radio stream. Take the figurine off and the sound carries on, or stops, depending on the setting.
Everything is configured from a browser, on the home WiFi, at
http://marelleo.local. Nothing to install. The box fetches its own updates.
| Gesture | Effect |
|---|---|
| Put a figurine on | plays its list |
| Put the same one back | resumes if it was paused |
| Short press | pause, resume, or restart a finished list |
| Long press | next track |
| Knob | volume, and power off at the click at the bottom of its travel |
Formats played: MP3 and M4A. The stories live on a microSD card.
Two ways to build it
On breadboard and perfboard, with off-the-shelf modules. This is where to start: you get it wrong, you unplug, you start again, and nothing is damaged. Not a single solder joint for the first version.
On the printed board, whose manufacturing files are in carte/.
Five assembled boards cost about 160 euros from JLCPCB, so 32 euros a board
with components placed. It is cleaner, smaller, and it lasts.
The same firmware runs on both: pio run -e boite for the modules,
pio run -e carte for the printed board.
What to buy
Module version, to start with
| Role | Part | Ballpark price |
|---|---|---|
| Brains | ESP32-S3-DevKitC-1 N16R8 | 15 € |
| NFC reader | PN532, the red board, in serial mode (HSU) | 10 € |
| Audio | MAX98357A, I2S converter and amplifier | 7 € |
| Speaker | Visaton FRS 7, 4 Ω | 15 € |
| Power | Lipo Rider Plus, or any 5 V charging module | 12 € |
| Volume | 10 kΩ potentiometer with a switch | 3 € |
| Tags | NTAG213 25 mm, on-metal type | 10 € for 20 |
| Prototyping | breadboard and Dupont wires | 10 € |
The PN532 ships configured for I2C: there are two small switches on the board, set them to HSU. It is printed on the back.
Pinout, module version
| GPIO | To |
|---|---|
4 |
amplifier SD, mutes the hiss at idle |
5 6 7 |
amplifier BCLK LRC DIN |
8 9 |
PN532 TXD RXD |
11 12 13 14 |
SD card CS SCK MOSI MISO |
10 |
potentiometer wiper, must be on ADC1 |
18 |
button |
48 |
onboard LED |
The potentiometer has to sit on an ADC1 pin, that is to say 1 to 10: the
ESP32-S3's ADC2 goes mute as soon as WiFi comes up, and the volume starts
jumping around for no visible reason.
The enclosure
Three parts in boitier/, to print in PLA:
| File | Size | Notes |
|---|---|---|
marelleo-corps.stl |
120 × 120 × 80 mm | the cube, raised name and engraved landing circle |
marelleo-base.stl |
120 × 120 × 29 mm | the bottom, which carries the board and the battery |
marelleo-molette.stl |
24 × 24 × 12 mm | the volume knob |
Printed on a Bambu Lab A1, 0.4 nozzle, 0.2 layers, three walls, 15 % infill. The body goes on the plate open face up: no supports needed.
The PN532's antenna sits right under the engraved circle. Its range goes through 3 mm of PLA without trouble.
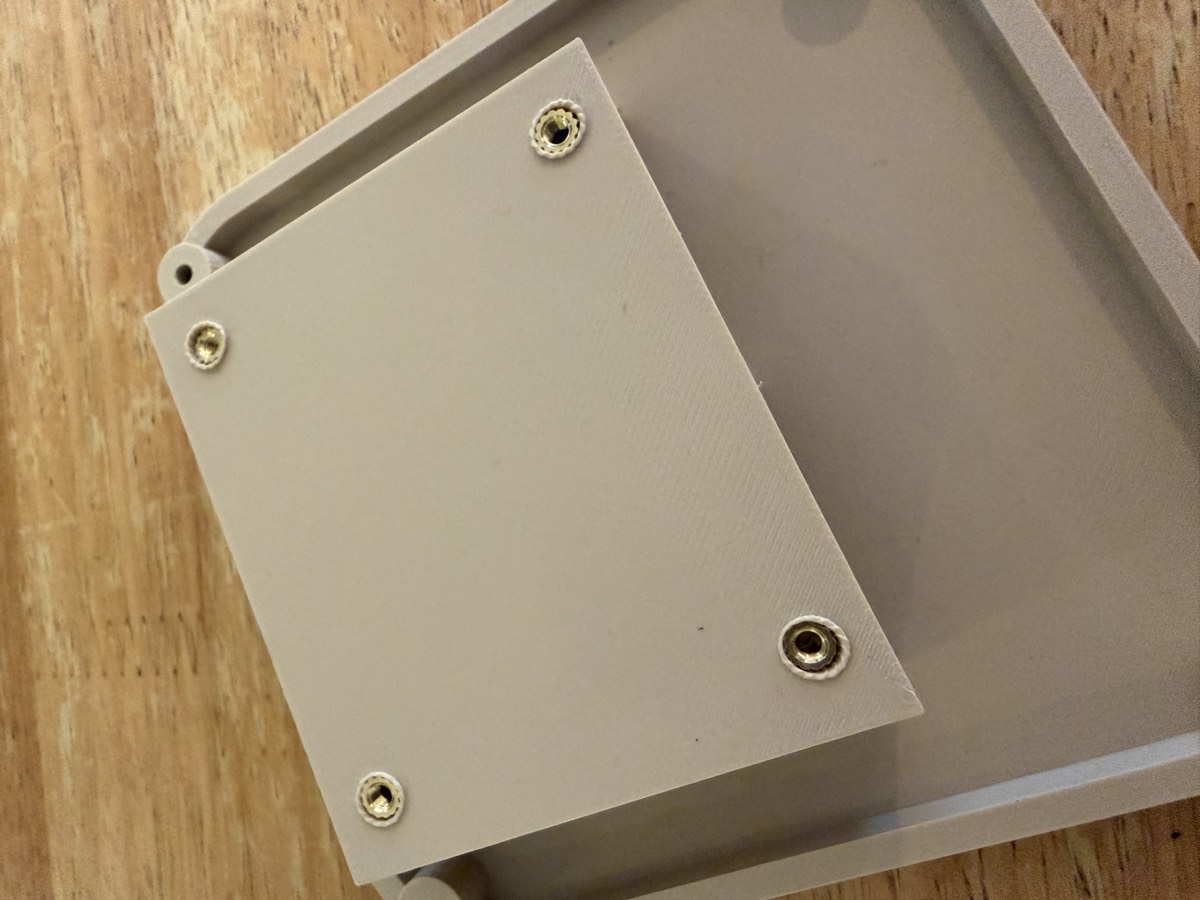
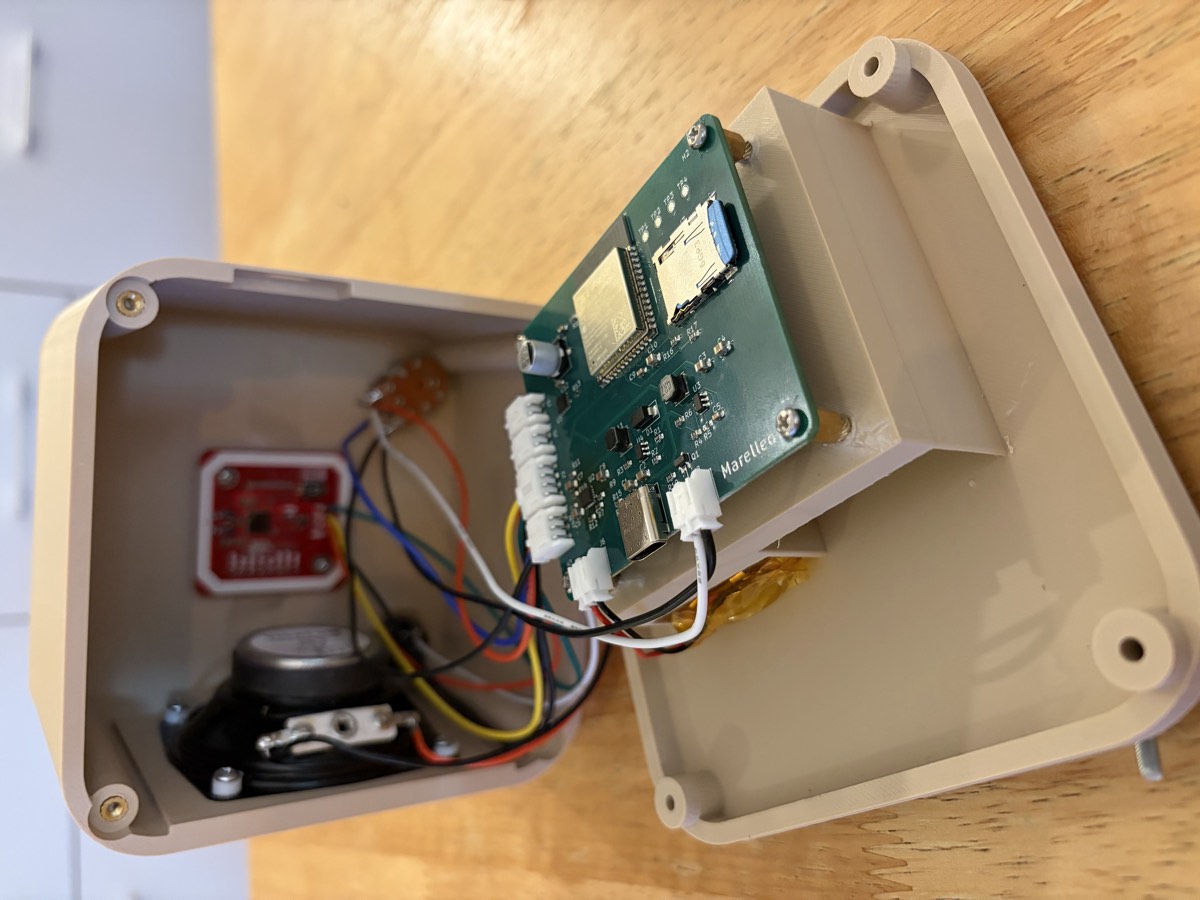
Do not screw straight into the plastic. It holds once, twice, and on the third go the part splits along the layers. Use M3 brass inserts: set one on the hole, come down on it with the tip of the soldering iron, the brass melts the plastic around itself and sinks in. You get a metal thread you can undo a hundred times.
The board
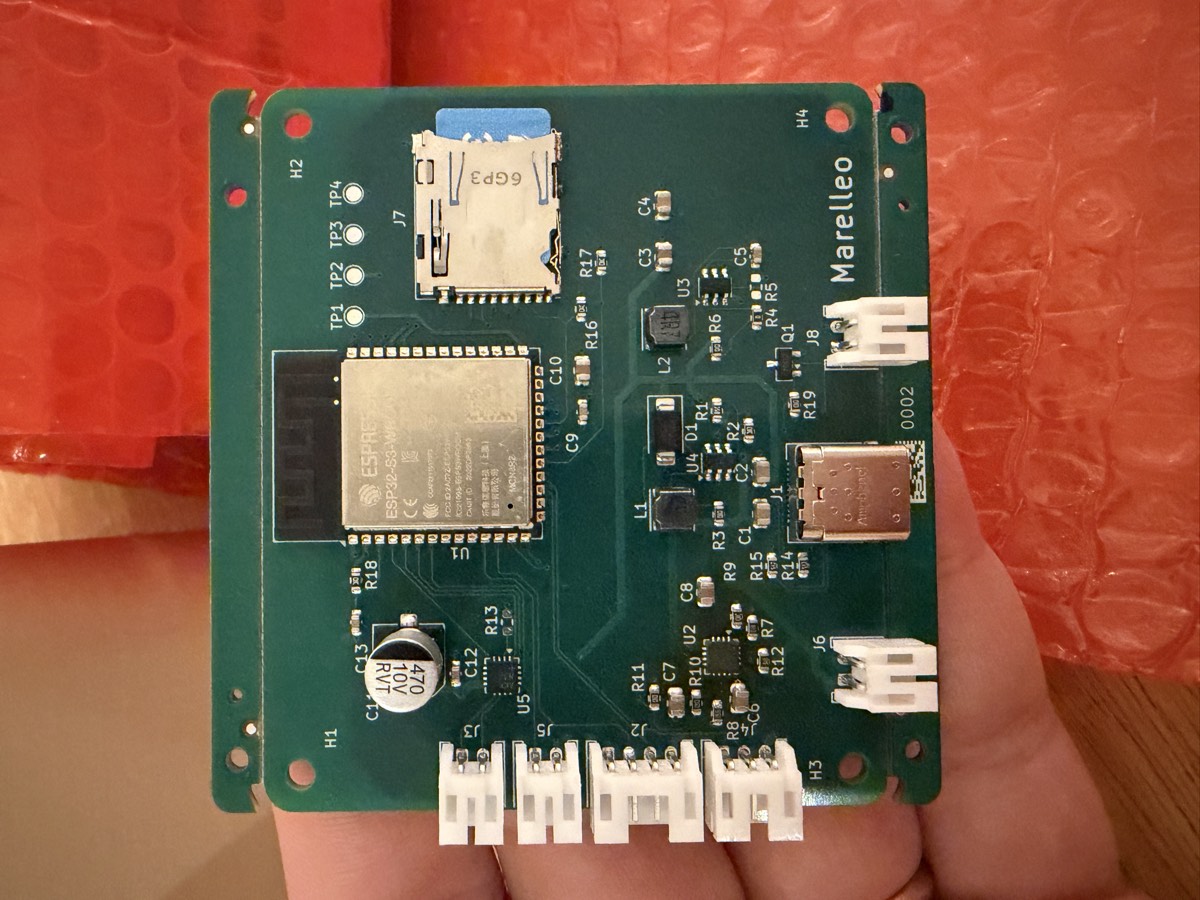
Everything is in carte/:
marelleo-gerbers.zip: upload as is to the manufacturer;fab/marelleo-bom.csvandfab/marelleo-cpl.csv: so JLCPCB can place the components;composants.csv: the readable list, with LCSC part numbers;marelleo.kicad_pcb: the board itself, if you want to modify it;generer.py: the script that draws it, because the board is generated rather than clicked;schema.md: read this before ordering. The choices, the bench measurements, and the traps that cost me evenings.
Order from JLCPCB: four layers, 1.6 mm, assembly on the
top side, standard and extended parts. Check LCSC stock on the day you order,
stock.py does it for you.
Two known deviations are documented in schema.md, including the D1 diode
whose rotation has to be corrected by 180 degrees in their preview. Read it.
The firmware
It is written for this exact build. The pinout lives in the code, not in a
configuration file: the two environments match my printed board and my module
prototype, and nothing else. If you wire it differently, a moved wire means a
constant to change at the top of src/main.cpp, and until that is done it will
not work, sometimes without saying anything. Start by reproducing the pinout
given above, and only move it afterwards.
And this is a weekend project, not a product. It runs every day at my house, which is a sample of one box. There are rough edges left, cases nobody has run into, and things I would do differently if I rewrote it. Read it as a starting point that works, not as a reference.
PlatformIO does all the work.
cd firmware
pio run -e boite -t upload     # modules on perfboard
pio run -e carte -t upload     # printed board
pio device monitor
Both environments compile the same code. What changes is the pinout, the flash
size and the PSRAM type, and mixing them up gives you a board that does not
start at all: carte/schema.md explains why.
First start-up
The box knows no network when first powered on, so it opens its own, named
Marelleo-XXXX. A phone that connects to it brings up the setup page on its
own, like in a hotel. You pick the home WiFi there, and the box restarts on it.
After that, http://marelleo.local from any device on the network.
Button held for three seconds at power-on: the WiFi credentials are erased and the box reopens its portal. That is the way out for a box that moves house, or that you give away.
Updates
The firmware compiled here fetches the versions published on
maj.marelleo.org, which are mine. A new version gets three start-ups to prove
itself: if it cannot find the network, the box goes back to the previous one on
its own.
If you modify the code, change MAJ_SOURCE_DEFAUT in
firmware/src/version.h, otherwise the box will replace your version with
mine at the first check.
The figurines
Any object will do: a wooden figure, a toy car, a token, a flat pebble. Glue a 25 mm NTAG213 tag under its feet, the on-metal type if the object contains any metal.
Put the figurine on the box, open http://marelleo.local, and it appears at
the top of the list. Give it a name, send files or search for a podcast, and
that is it. A figurine carries stories or a radio, never both.
Licence
MIT, for the code as well as the manufacturing files. Build it, change it, sell it, give it away. If you make something out of it, I would love to see it.
Marelleo, from marelle, the French word for hopscotch, the game where you move forward by putting a foot down on a square. But mostly from Marceau, Ella and Léonie, to whom the box belongs.