

TigerScale V3
The connected filament scale that knows which spool is on it.
Touchscreen, dual NFC readers, live remaining-weight tracking for the open TigerTag standard.







What it does · Build one · Get help on Discord
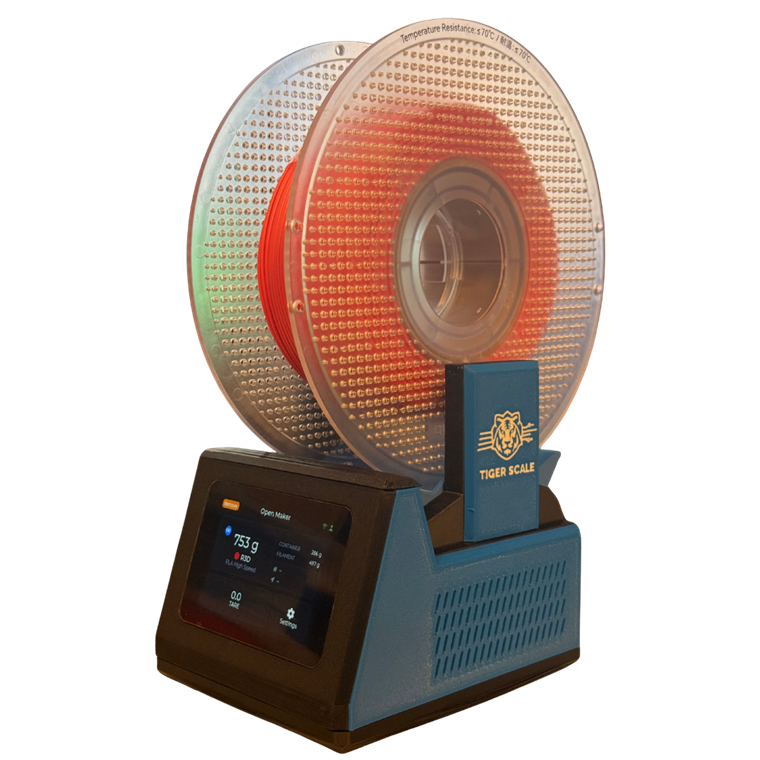
TigerScale V3 is open-source firmware for a connected 3D-printing filament scale. It runs on an ESP32-S3 with a 3.5" touchscreen and two PN532 NFC readers: place a spool carrying a TigerTag tag on the platform and it identifies the spool, weighs it, subtracts the empty spool's weight and reports how much filament is left. MIT licensed, built with PlatformIO.
Warning
TigerScale V3 is different from TigerPOD. They don't offer the same features.
What it does
Put a filament spool carrying a TigerTag NFC tag on the platform. The scale reads the tag, weighs the spool, subtracts the empty spool's weight, and shows you how much filament is actually left — then syncs it to your TigerTag account so every device you own agrees.
No typing in spool weights. No guessing from the diameter of what's left on the reel. Put it down, read it, done.
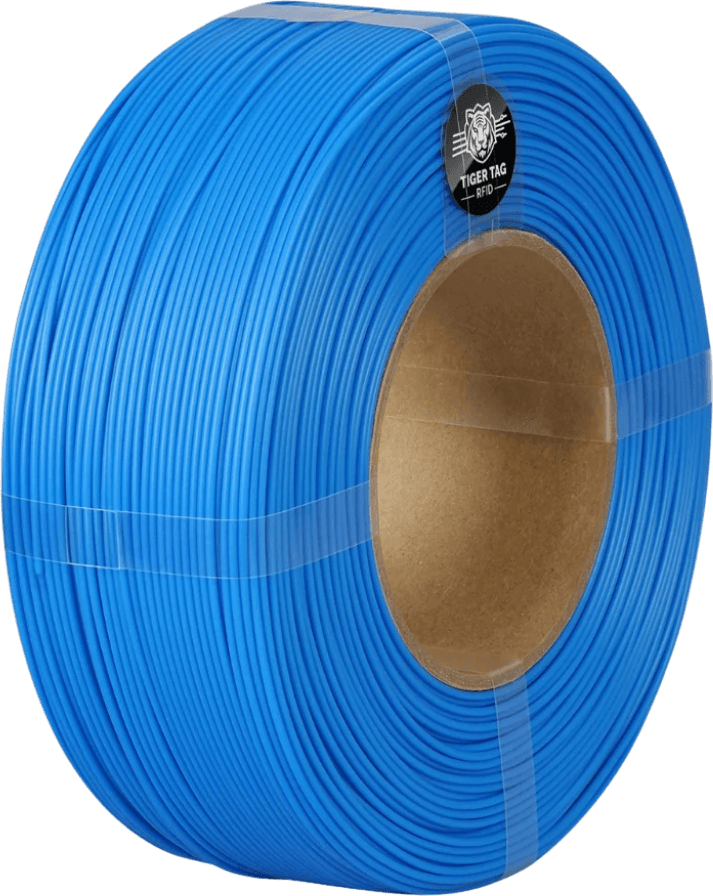
The chip is a 25 mm sticker on the coil. Every spool carries two, on opposite sides, so one always faces the reader whichever way the spool is loaded.
Why V3 is a different machine
V3 is not a firmware update to TigerScale V2 — it is different hardware, and the two are not interchangeable.
| V2 | V3 | |
|---|---|---|
| MCU | ESP32-WROOM | ESP32-S3 (16 MB flash, PSRAM) |
| Display | 0.96" monochrome OLED | 3.5" 480×320 colour touchscreen |
| UI | text on an OLED | LVGL v8.4, full touch UI |
| NFC | 2× RC522 | 2× PN532 |
| Power | USB only | USB, plus an AXP2101 PMIC — a battery is optional |
| Audio | passive buzzer | ES8311 codec |
| Setup | serial / captive portal | on-screen: WiFi picker, keyboard, calibration wizard |
If you built a V2 it keeps working, and its repository stays online — but that line is finished and gets no further releases. The two firmwares are not interchangeable: V2's will not run on this board, and this one will not run on that one.
Features
- Dual NFC readers so twin-tagged spools are identified from either side
- Precision weighing through an HX711 and a load cell, with median + adaptive EMA filtering tuned for a kitchen-scale feel
- Full touchscreen UI — WiFi picker with on-screen keyboard, calibration wizard, hardware self-test, language selection, OTA updater
- Runs on USB, and takes an optional Li-ion battery: the on-board AXP2101 charges it and reports level and charge state
- 11 firmware languages (EN · PT · FR · ES · DE · ZH · IT · PL · PT-PT · RU · NL) and a 9-language web UI
- Works offline — brand and material identification comes from a database in the device's own flash, refreshed at most daily, so tag lookups never wait on the network
- Its own web UI, served from the device over LittleFS, mobile-friendly, live over WebSocket at 10 Hz
- Over-the-air updates from Settings → Update
- Cloud sync is optional. The scale is fully usable without an account — see docs/CLOUD.md for exactly what is sent and stored, and docs/ACCOUNT-PAIRING.md for how an account without a password gets linked
- No binary blobs. Everything here compiles from source
Quick start
Step 1 — install from your browser
Plug in your ESP32 → click Install → done. Use the button at the top of this page. One question — how your readers are wired — then it writes the bootloader, the partition table, the firmware and the web interface. Chrome, Edge or Opera on a desktop.
Step 2 — set it up on the scale
WiFi picker, then sign in from Settings → Cloud, then Settings → Calibration with a known weight. Put a tagged spool on the platform and it identifies itself. From then on the scale updates itself over the air.
Or build it yourself
git clone https://github.com/TigerTag-Project/Tiger-Scale-V3.git
cd Tiger-Scale-V3

bash scripts/flash.sh --fs --monitor
That builds the reference firmware, flashes it, uploads the web UI and opens the serial console. Then follow the on-screen setup: WiFi → sign in → calibrate.
One thing to get right first. The NFC transport is chosen at compile time and must match how your readers are wired. Build the wrong one and the scale detects no reader at all, with no error message to tell you why:
| Your wiring | Build with |
|---|---|
| HSU / UART (2 readers) | bash scripts/flash.sh — the default, bench-verified |
| SPI (2 readers) | bash scripts/flash.sh --env esp32s3 |
| I²C (1 reader) | bash scripts/flash.sh --env esp32s3_i2c |
Wiring diagrams: docs/HARDWARE.md.
Requires PlatformIO Core. The Arduino IDE cannot build this project — LVGL's config needs an include path the IDE has no equivalent for.
Hardware
| Qty | Component | |
|---|---|---|
| 1 | Waveshare ESP32-S3-Touch-LCD-3.5B — 480×320 IPS touch (the -3.5 without the B works too) | -3.5B · -3.5 |
| 2 | PN532 V3 NFC module — pin header and mode switch required | buy |
| 1 | 5 kg load cell + HX711 | buy |
| 1 | USB-C 4-pin cable + connector | cable · connector |
| 1 | Small speaker | ships with the ESP32-S3 board |
| 1 | Li-ion battery | optional — the scale runs on USB |
| — | Dupont wires, M3 self-tapping screws | wires · screws |
| — | 2× M4×30 and 2× M5×30 (load cell), 4× M2×6 (display) | — |
| — | Enclosure — printable 3MF, Bambu Studio project | MakerWorld |
Full costed list with every link: docs/HARDWARE.md
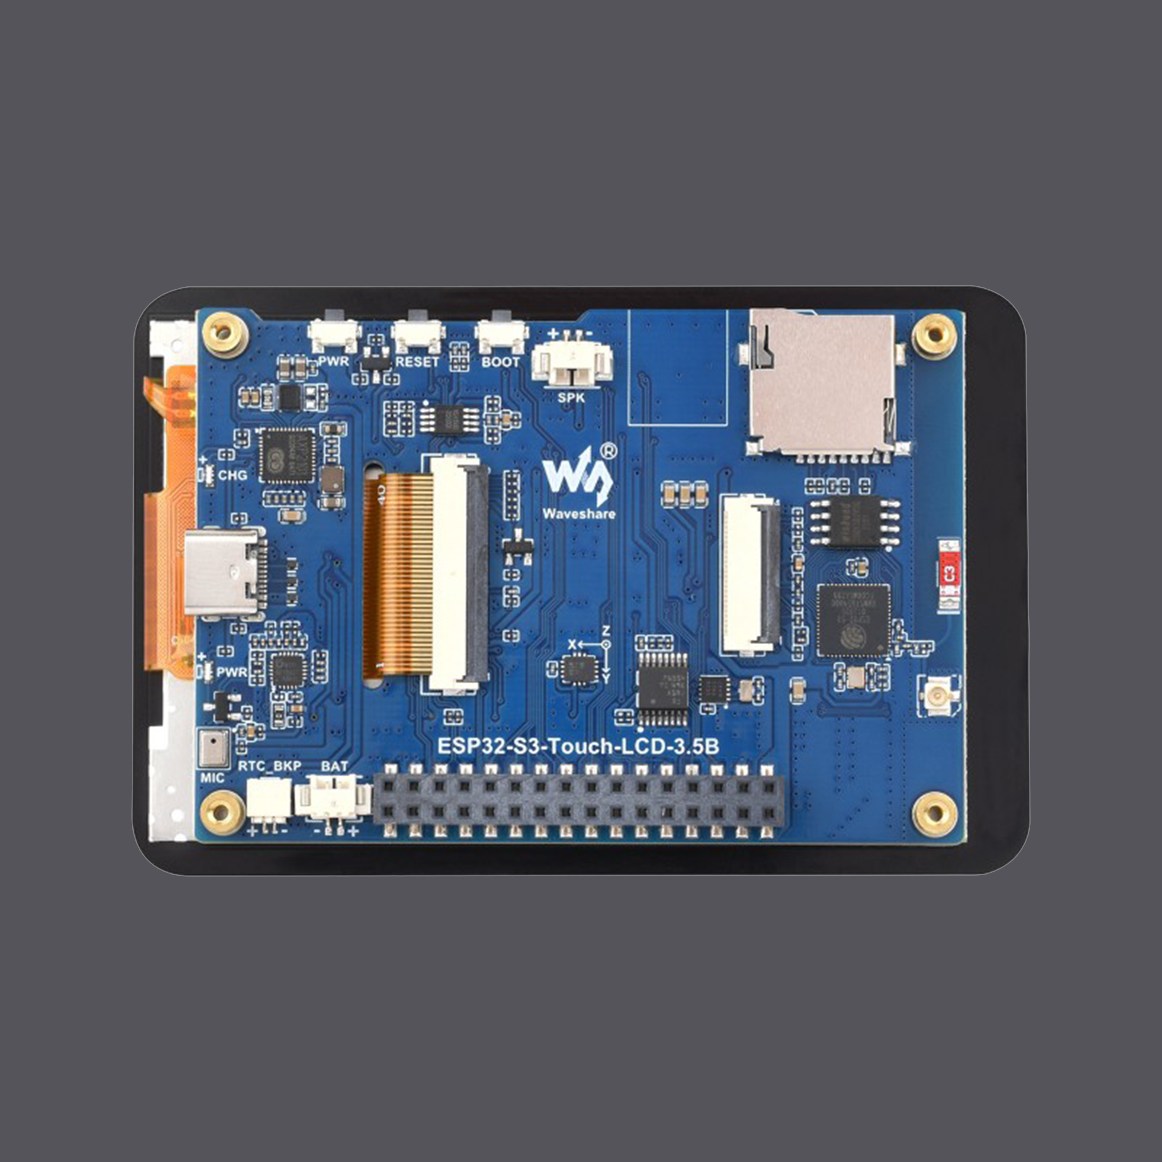 Both variants work, but they need different firmware. Read the silkscreen: -3.5B or -3.5. The web installer asks which one you have; the wiring and the case are the same either way. |
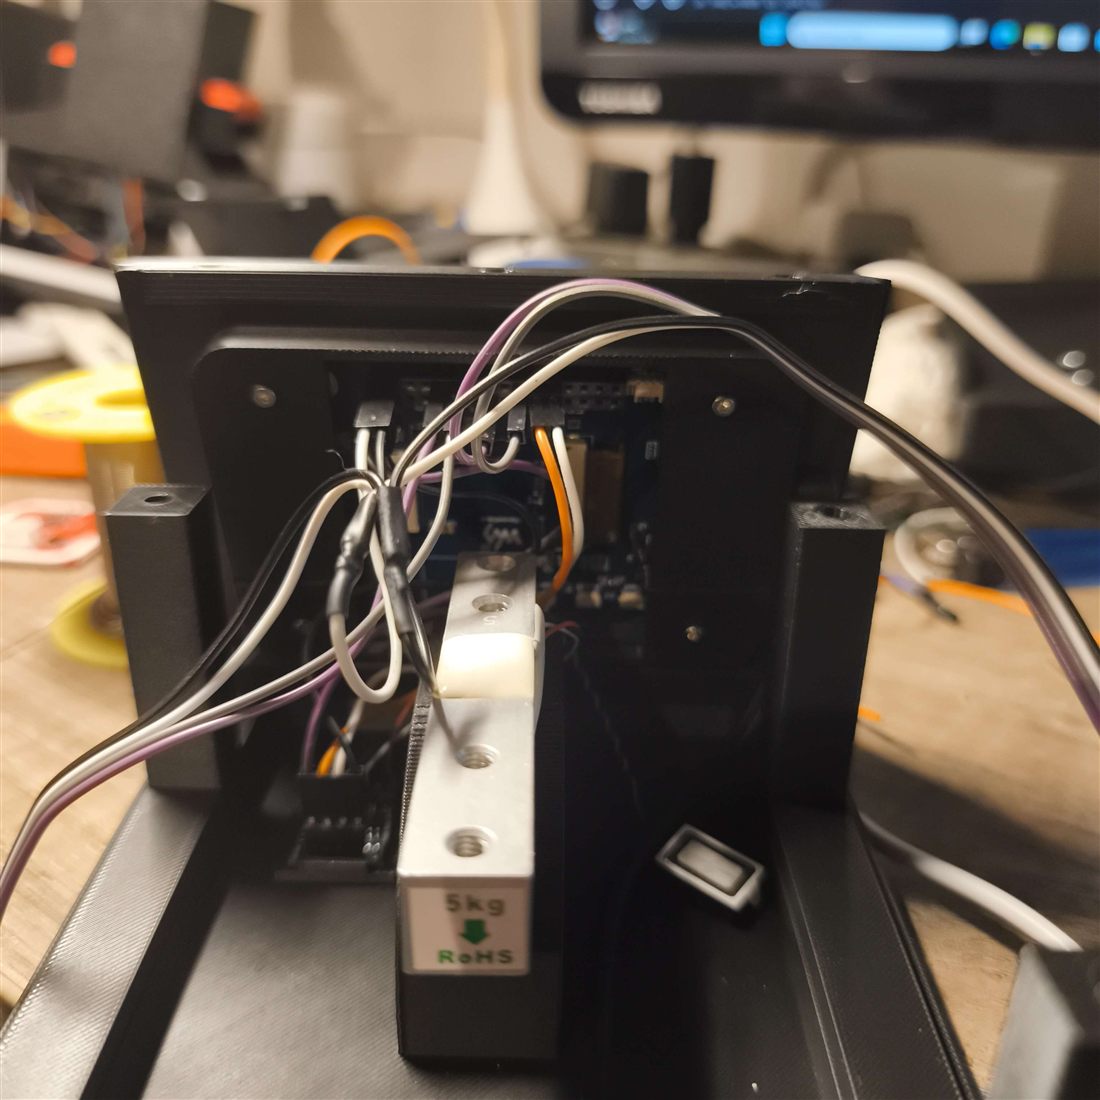
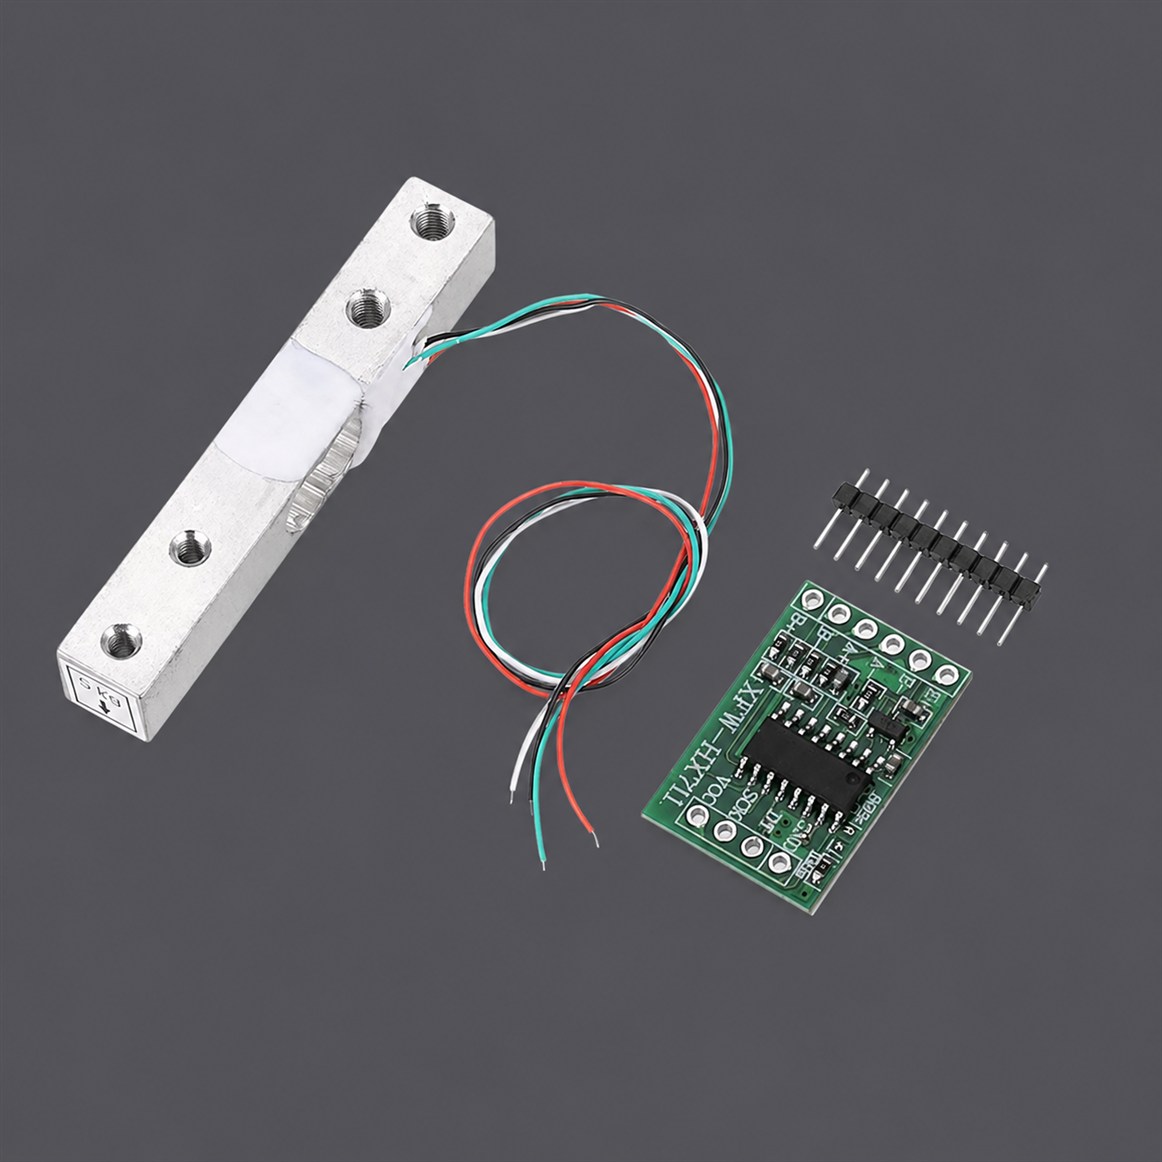 Warning: the load cell must have 2× M4 and 2× M5 tapped holes, and the HX711 board must be identical to the one shown — otherwise it will not fit in its designated slot. |
Ready to slice
The enclosure is on MakerWorld as one .3mf
Bambu Studio project with the plates already laid out —
open it in Bambu Studio or Orca and press Slice. No orientation to set, no
supports to place.
| Part | What it is |
|---|---|
base2 |
Bottom shell with the load-cell support built in, carries the load cell and the HX711 |
plateau |
The platform the spool sits on |
ecran |
Bezel for the 3.5" touchscreen |
tampa · tampa rfid |
Top cover and the cover over the NFC bay |
traseira |
Back panel |
That link is permanent: it always serves the current revision, so it stays valid when the enclosure is updated. Any slicer that reads 3MF will open the file, though the plate arrangement is Bambu-specific.
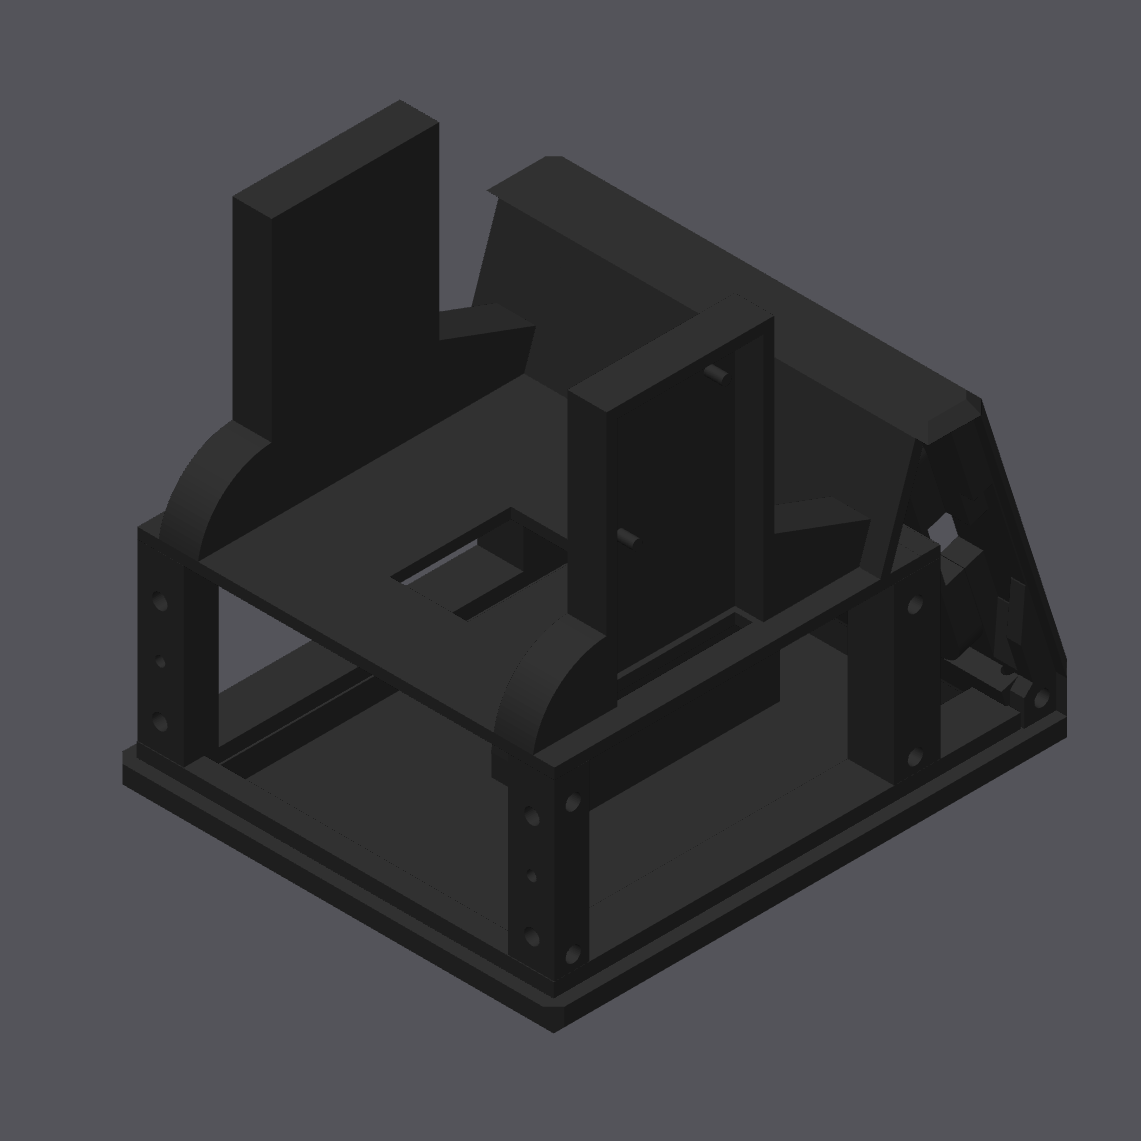
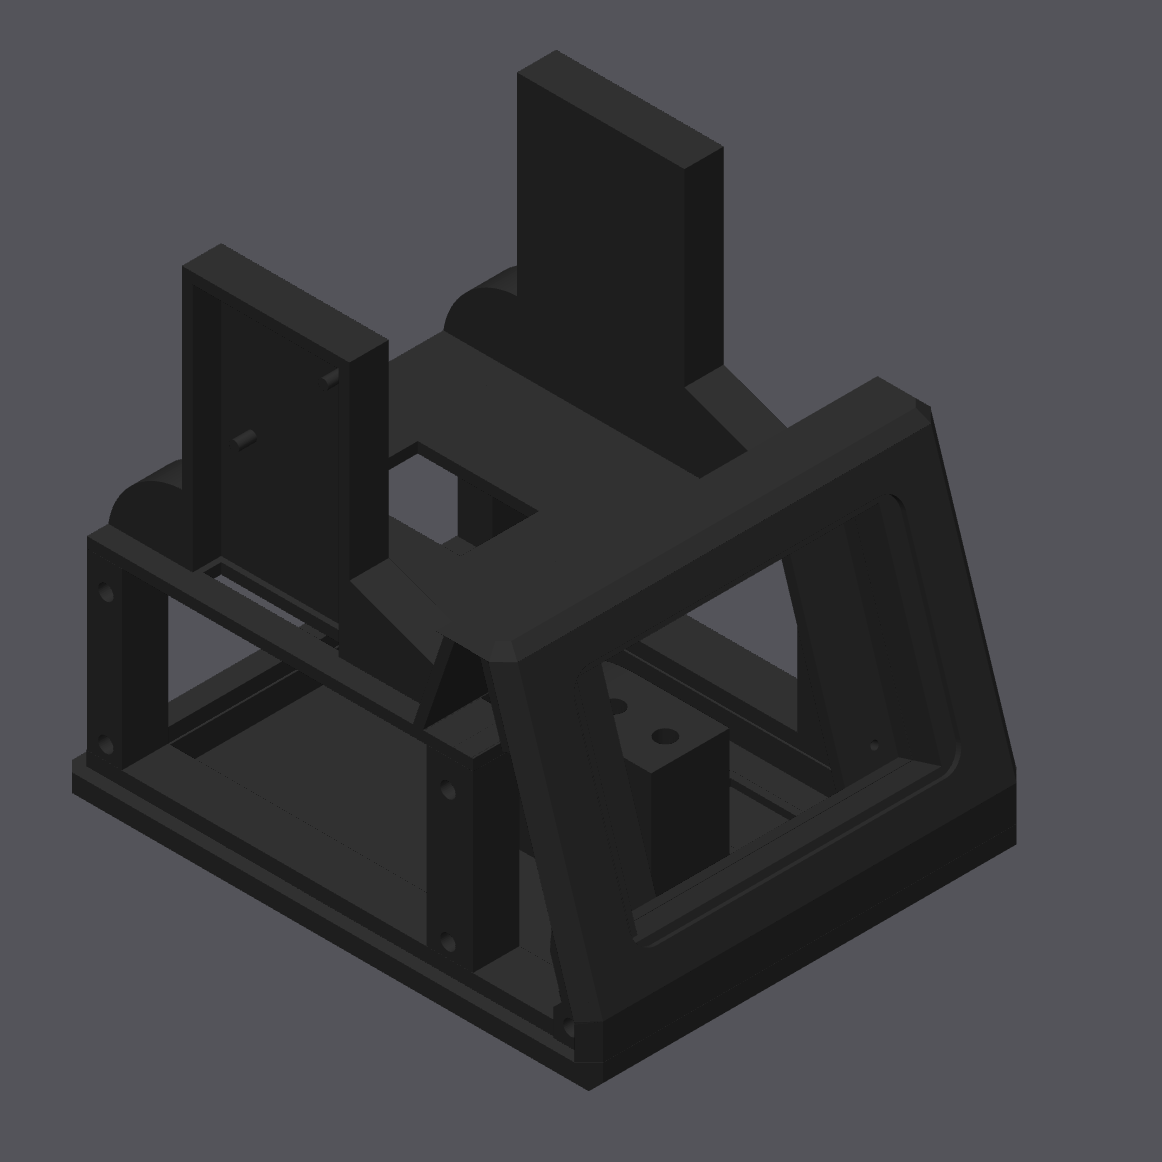 Front three-quarter |
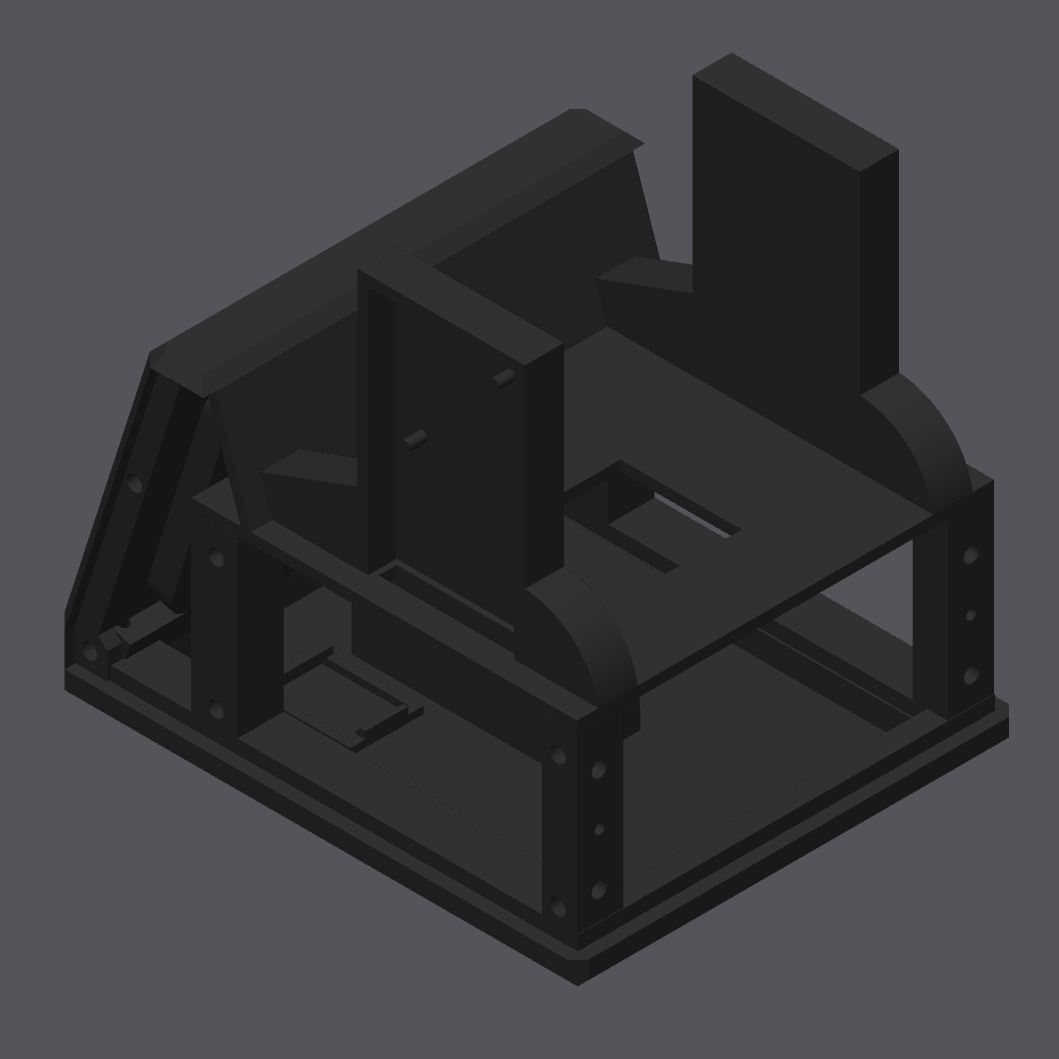
 Rear three-quarter |
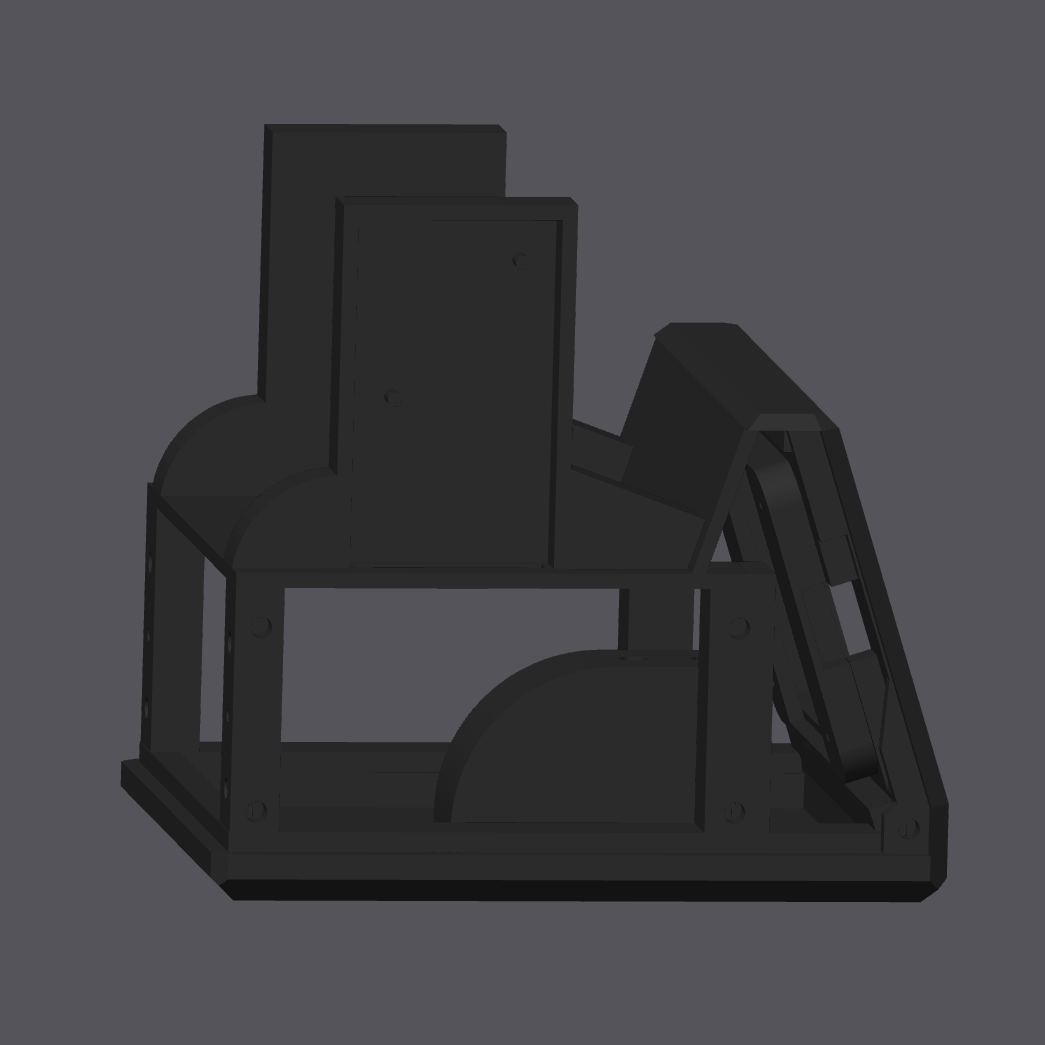
 Rear three-quarter, close |
 Side elevation |
 Scale position and orientation |
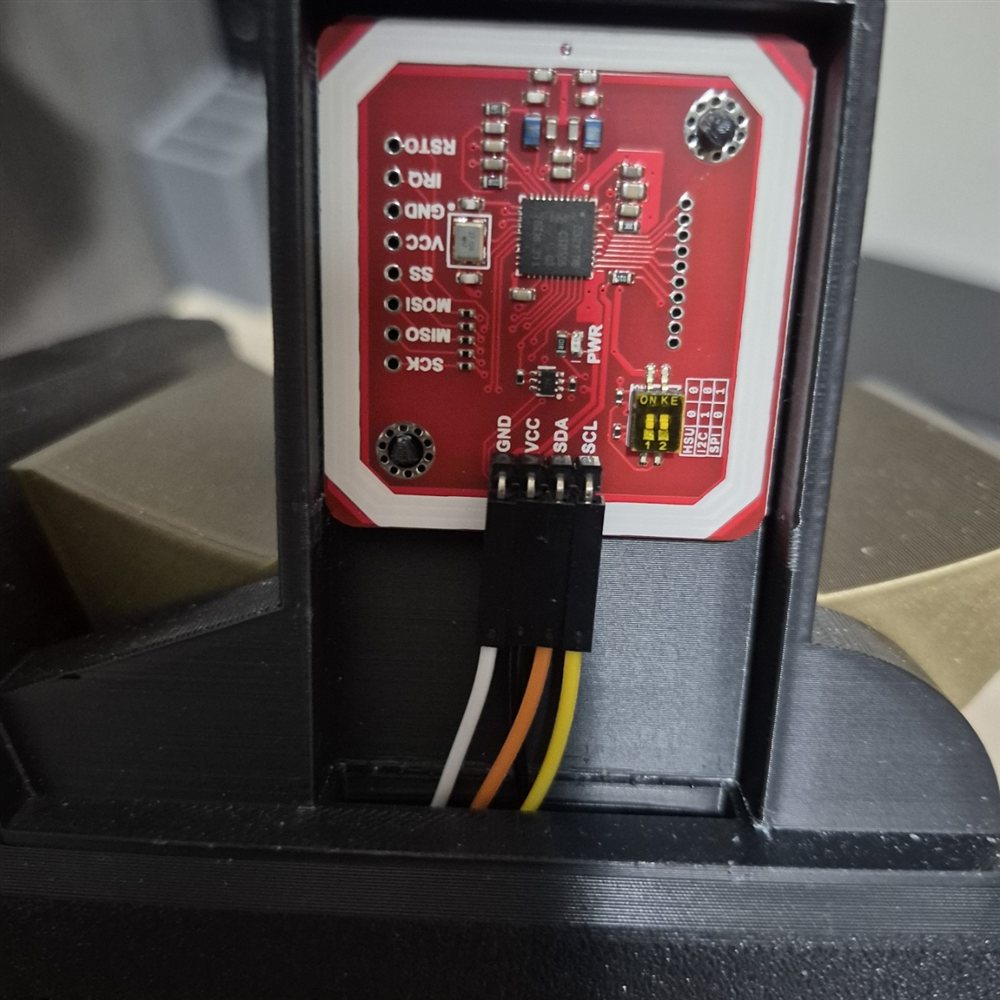 PN532 seated in its slot |
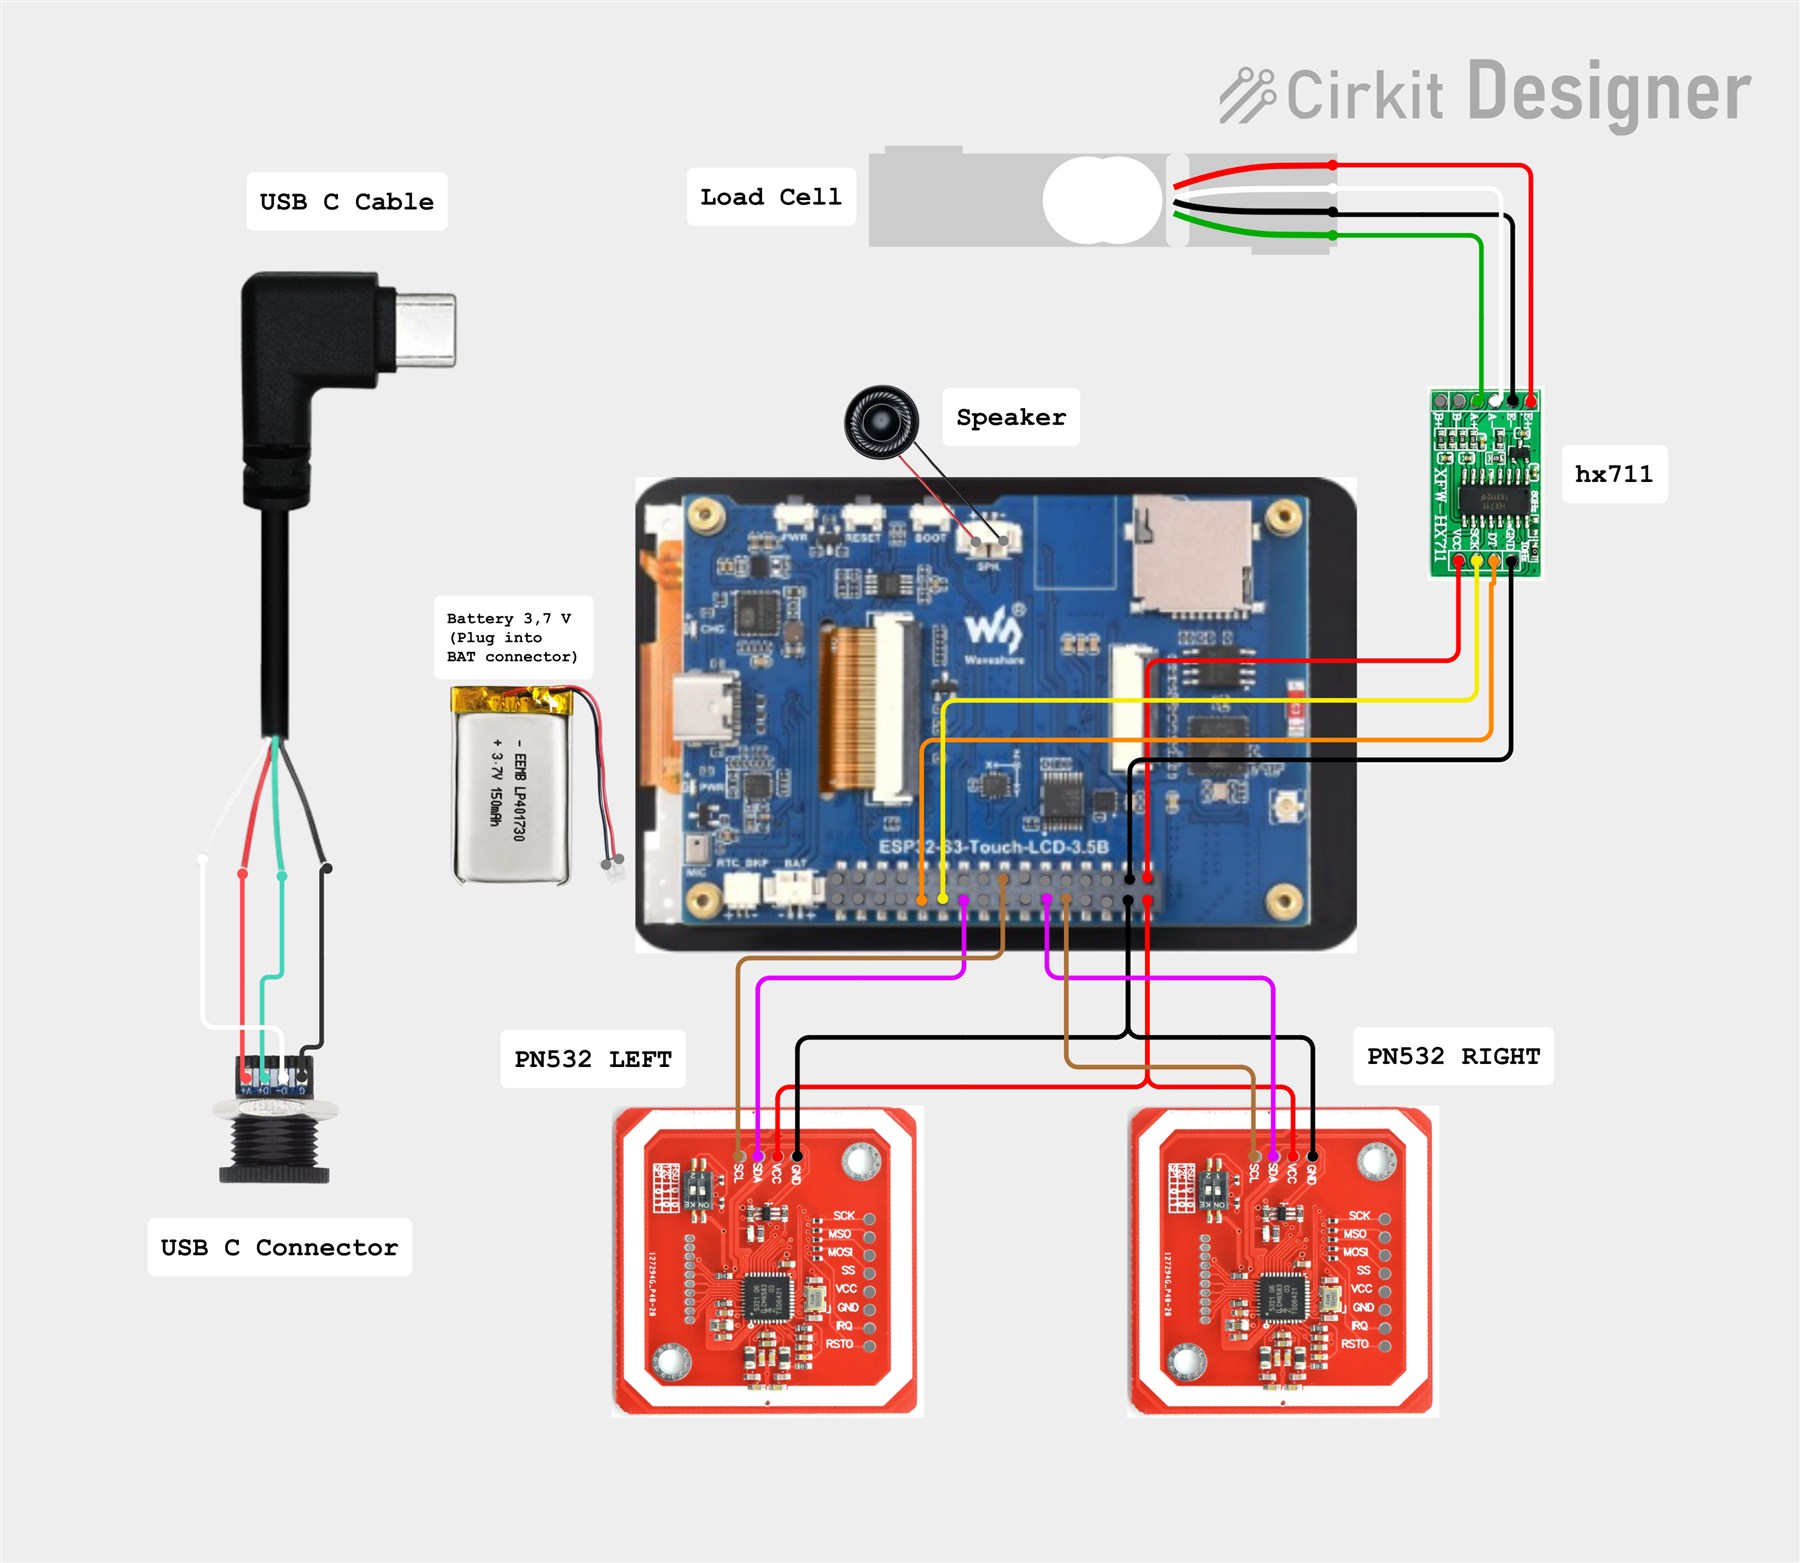
Pin-by-pin wiring · Interactive schematic in Cirkit Designer
Full pinout, bus topology and the wiring for each transport: docs/HARDWARE.md
Warning
Sealed USB-C-only PN532 dongles will not work with this board. Not a firmware limitation — the board's USB-C port is wired as a device and can never act as a host. Get modules with a pin header. The full postmortem explains why, so you don't have to find out the way we did.
Make and sell it
Anyone can manufacture and sell TigerScale hardware. No licence fee, no royalty, no registration.
- Build it — bill of materials and wiring in docs/HARDWARE.md, enclosure as a printable 3MF.
- Flash the official firmware from the web installer — it always serves the current release, and the scale updates itself over the air after that.
- Ship it.
The only condition for calling your product TigerScale is running the official firmware unmodified, so every unit behaves the same way inside the TigerTag ecosystem. Forks are welcome — give them a different name.
Note
V3 picks its NFC transport at compile time, so flash the build that matches the wiring you assembled. The wrong one gives a scale that starts up perfectly and never sees a tag, with nothing on screen to say why. All three builds are official; the installer asks that question first.
Full terms: TRADEMARK.md.
Documentation
| Document | For |
|---|---|
| WHATSNEW.md | What each release changes, in one scroll |
| docs/INSTALLATION.md | Building, flashing, first boot |
| docs/HARDWARE.md | Pinout, buses, wiring per transport |
| docs/TROUBLESHOOTING.md | When something doesn't work |
| docs/SERIAL-PORT.md | No COM port when flashing: drivers per OS |
| docs/CLOUD.md | What's sent, what's stored, how to wipe it |
| docs/TELEMETRY.md | Every reported field, for anything reading a scale |
| docs/API.md | The scale's own HTTP and WebSocket API, on the LAN |
| docs/FIRMWARE.md | Internals, for contributors |
| docs/USB_HOST_POSTMORTEM.md | Why USB NFC is impossible here |
| CODEMAP.md | Section and function map of the firmware |
| CONTRIBUTING.md | How to help |
Contributing
Yes please — especially bench-verification of the SPI and I²C wiring, enclosure remixes, and translations.
The firmware is one ~17 200-line file, which sounds worse than it is: CODEMAP.md maps every section and function so you can go straight to the 60 lines you need. Read CONTRIBUTING.md first — it also covers the guard scripts you should run before opening a pull request.
Known limitations
Stated up front rather than discovered later:
- Published builds assume the HSU wiring. SPI and I²C still build from source but are no longer published, so a unit wired either way must be flashed over USB and should not take a published update — it would come back on the HSU build and stop seeing its reader.
- SPI and I²C builds compile but are not bench-verified. Only HSU has been confirmed end-to-end on real hardware.
- The ESP32-S3-Touch-LCD-3.5 build is not bench-verified either. It is derived from the official schematic and compiles; the -3.5B is the variant that has been run on real hardware. A report from anyone holding a -3.5 is welcome.
- The local HTTP API is unauthenticated. Anyone on your LAN can read state and trigger a tare.
- The enclosure has not been print-verified by a second builder. The 3MF is the one the reference unit was built from; tolerances on another printer are unconfirmed.
downloadUserAvatar()is suspected to hang the device when given a valid URL; the avatar feature should be considered unfinished.
Filament brands shipping TigerTag
TigerScale is only as useful as the tags it reads, and those tags exist because filament manufacturers chose to put them on their spools.
Factory spools carry TigerTag+, not a plain TigerTag. The difference is the 32-byte reserved area at the end of the payload: on a standard TigerTag those bytes are free for community use, and on a TigerTag+ they carry an origin signature, issued under a private key held by TigerTag and available only to certified partners. A cloned tag fails that check — on the customer's own phone, offline, with no account needed. That is what a manufacturer is actually committing to when they tag a production line.
 Integrated across the whole production line

Rosa3D ships TigerTag+ on 100 % of its 1 kg spool production, announced publicly on their own channels: the first filament manufacturer to integrate the protocol directly into its factory lines, wi